4 Initial settings
This chapter describes this product’s initial setting and connects external devices.
4-1 Turning the power on, off, and restarting
Turning the power on
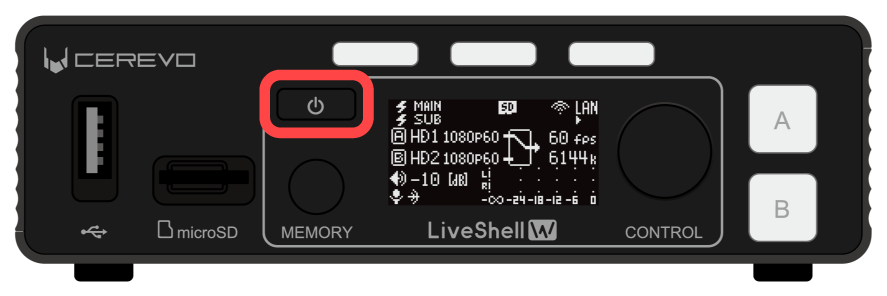
Once all 3 Preparation steps are complete, push and hold the power button on the front of this product until the Cerevo logo appears on the OLED screen. 
Tip
If the power does not turn on, see below.
→Won’t Power On/Won’t Start Up Properly
Turning the power off
To power off this product, follow the steps below.
Push and hold the power button on the front of this product until the menu appears on the OLED screen.
Turn the control dial on the front of this product and select “Power Off.”
Push the video select button A on the front of the product to turn off the power.
Restarting
To restart this product, follow the steps below.
This can be done from LiveShell Studio or this product itself.
Using LiveShell Studio
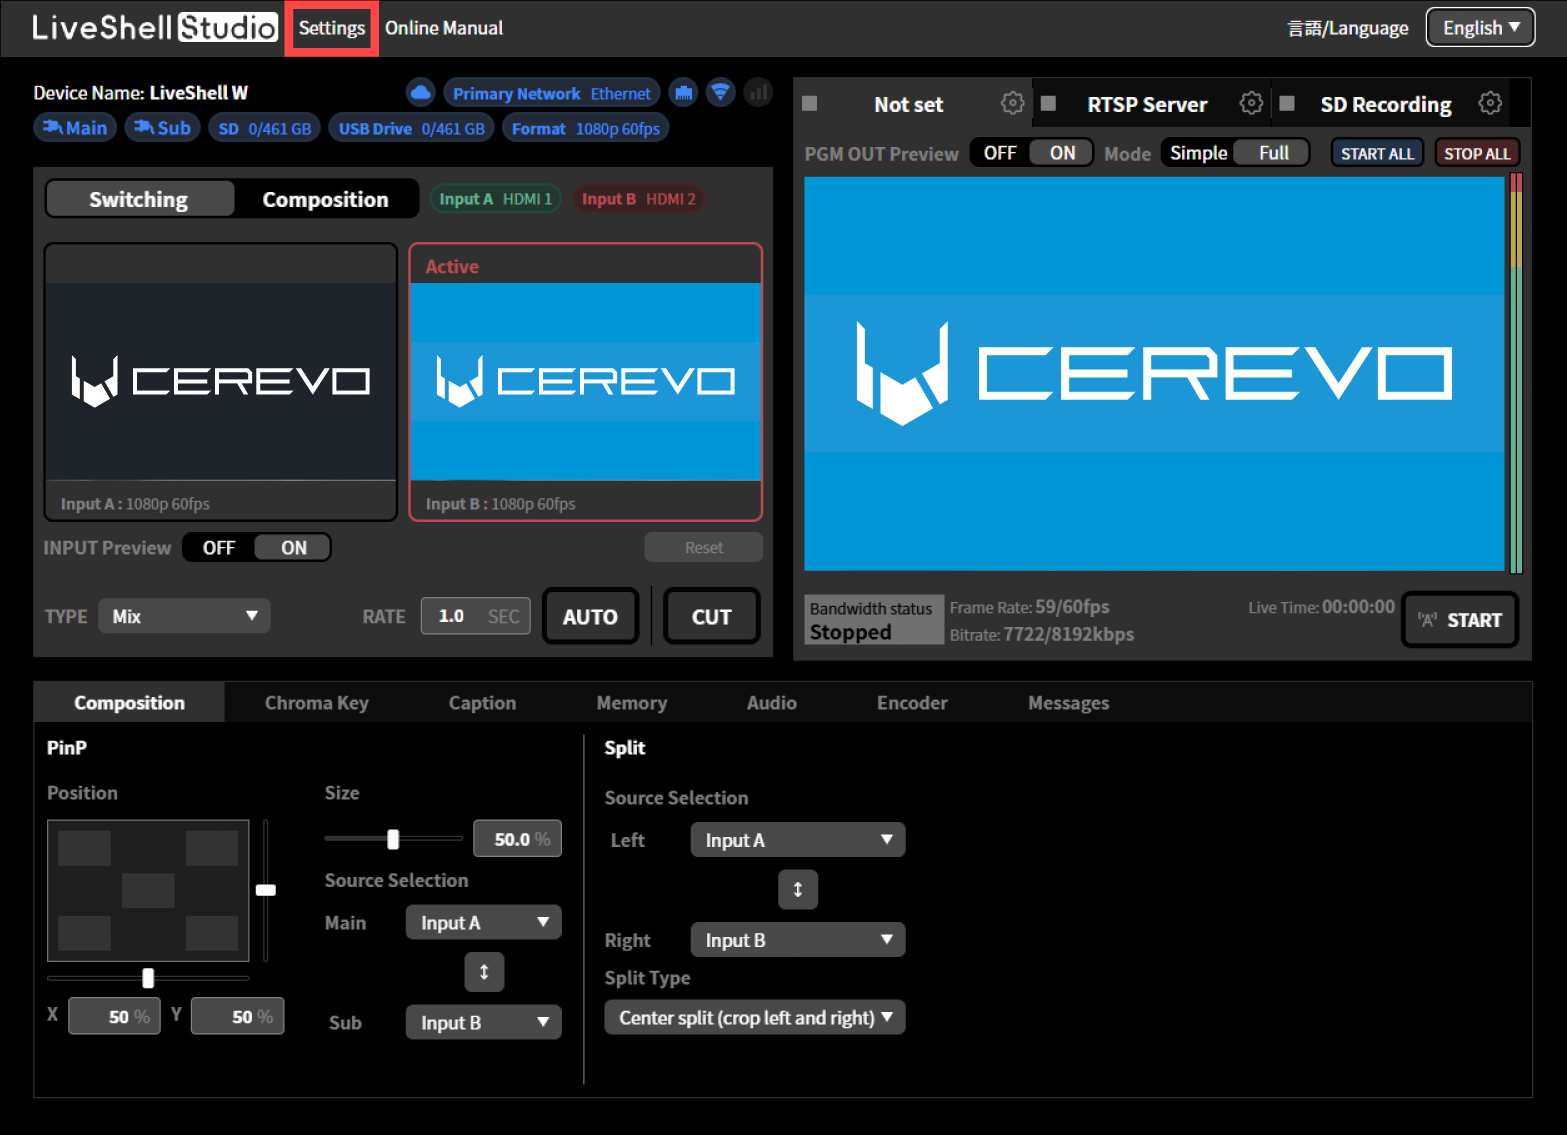
Click “Settings” at the top of the home screen.
Click the “Device Settings” tab at the top of the “Settings” screen.
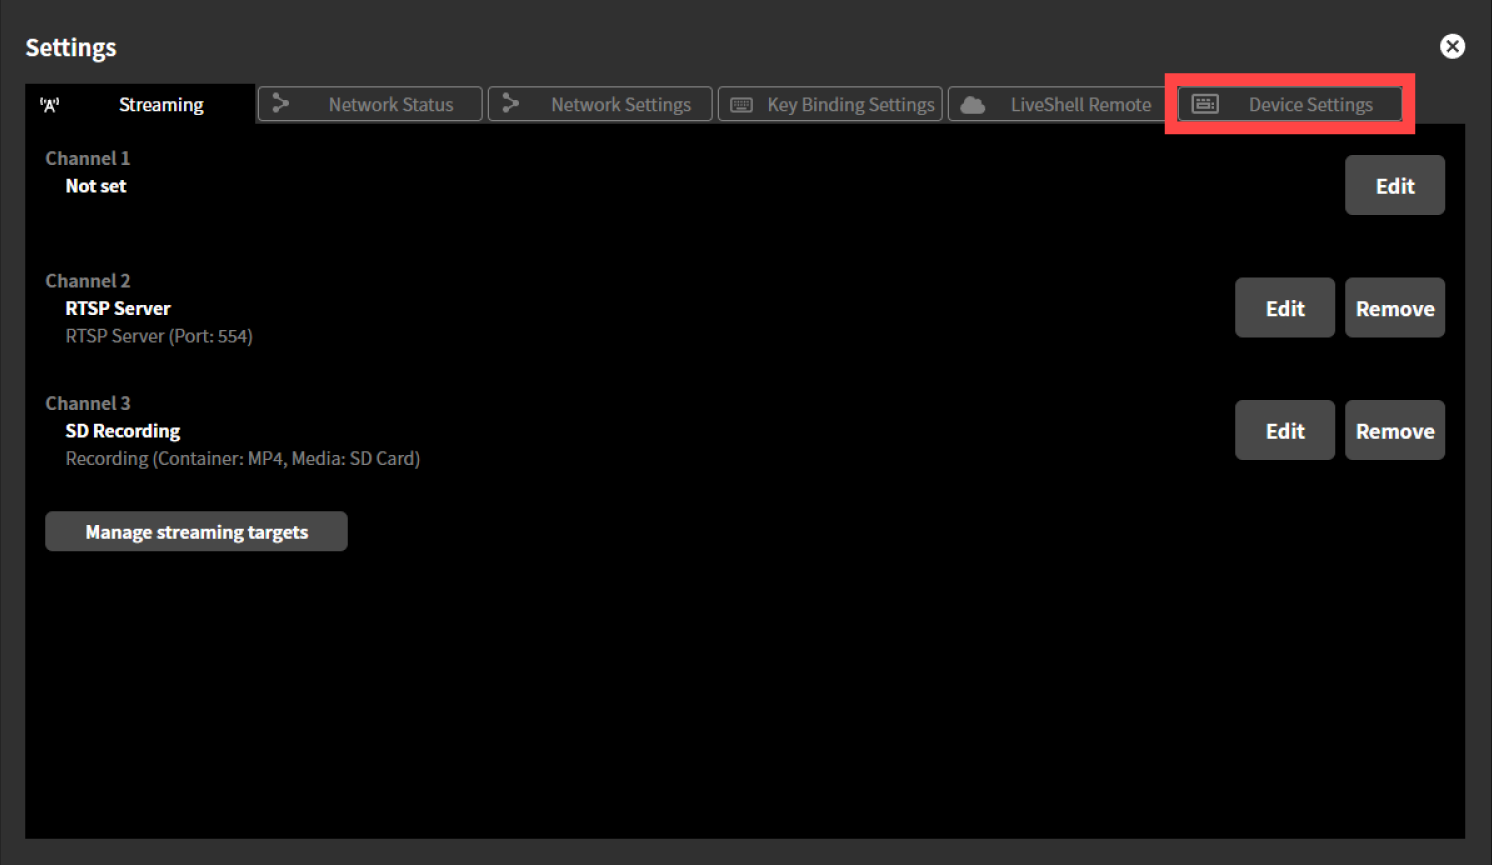
Click the “Reboot” button.
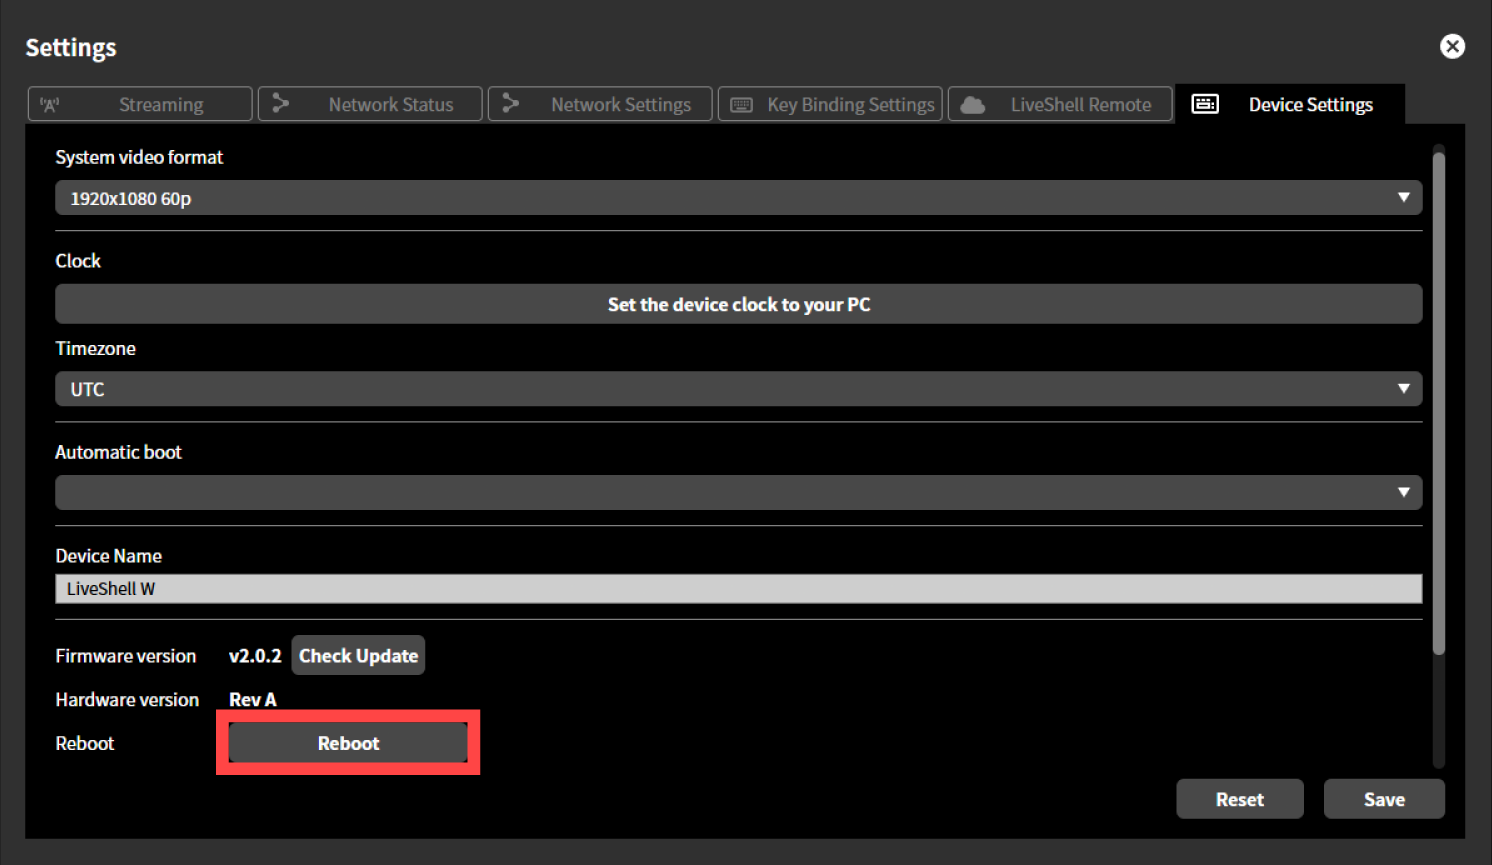
Click the “OK” button in the dialog box that appears to restart the device.
Using the Main unit
Push and hold the power button on the front of this product until the menu appears on the OLED screen.
Turn the control dial on the front of the device to select “Reboot” by pushing the control dial.
Press the video select button A on the front of the device to restart the device.
4-2 Connecting to a network
Perform the following steps depending on the network connection method you selected in 3-2 Preparing for Network Connection.
Connecting via Wired LAN
If connecting via wired LAN, the device will automatically connect to the network when you turn it on.
Connecting via Wireless LAN
If connecting via wireless LAN, you must prepare to connect to the network using wireless LAN access point mode.
Tip
What is a wireless LAN access point mode?
This mode temporarily turns the LiveShell W into a wireless LAN access point. Wireless LAN access point mode is only used to connect to LiveShell Studio and cannot be used for streaming. When using this product via a wireless LAN, the wireless LAN access point mode is generally only used only during initial setup.
Connecting this product to an operating device
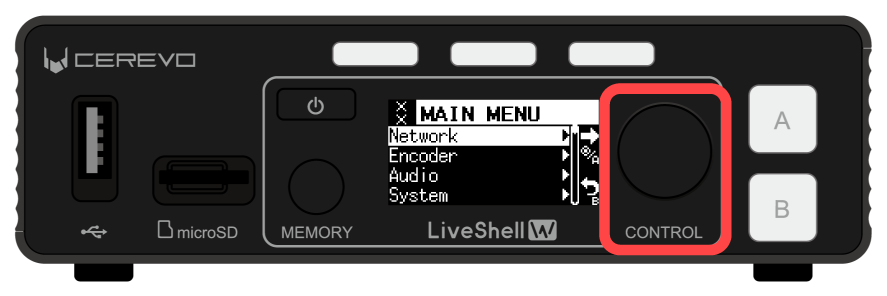
Push the control dial. “MAIN MENU” will display.
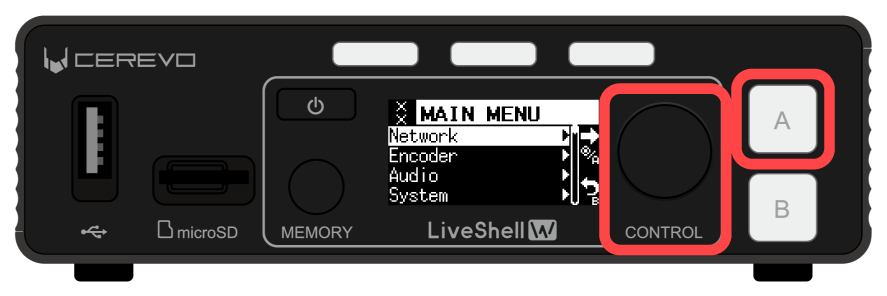
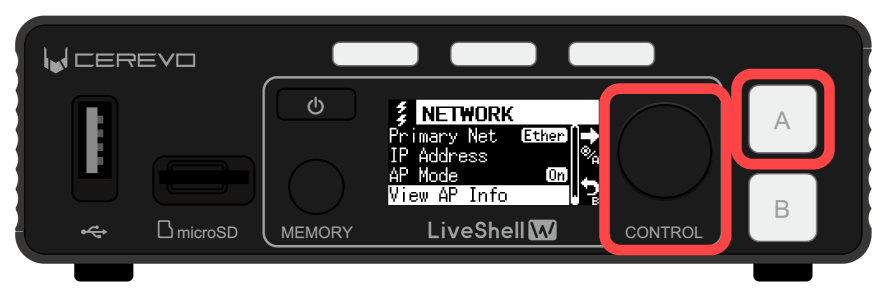
Turn the control dial to select “Network” and push the Video Select Button A.
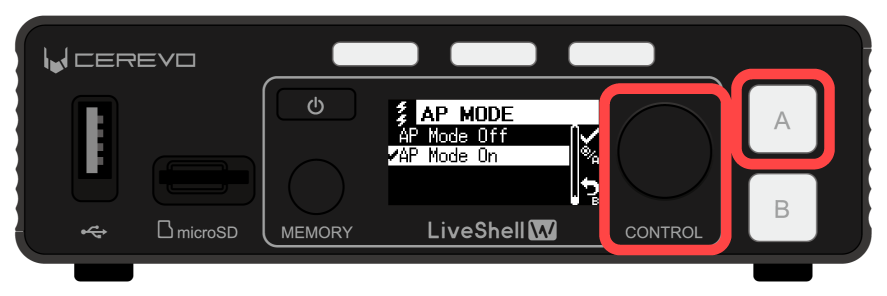
Turn the control dial to select “AP Mode” and push the Video Select Button A.
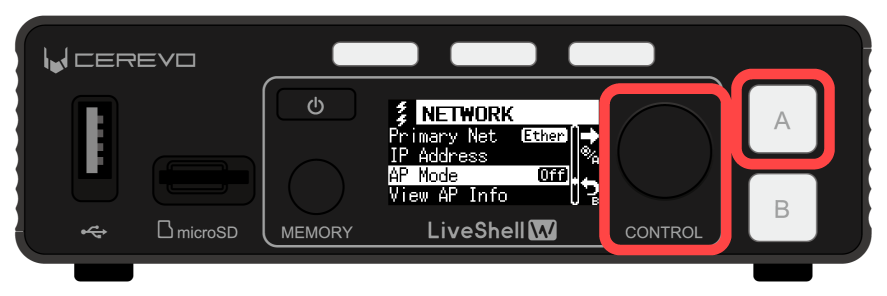
Turn the control dial to select “AP Mode On” and push the Video Select Button A.
Tip
If “AP Mode needs WLAN.” is displayed on the unit OLED screen, the wireless LAN adapter is not installed correctly or is not installed at all. Check the installation status of the wireless LAN adapter.
Push the video select button B and go back to the previous screen.
Turn the control dial to select “View AP Info” and push the video select button A.
The information required to temporarily connect this product to the operating device is displayed.
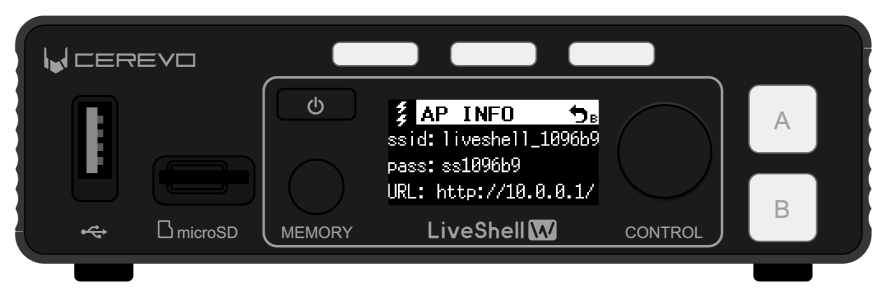
Now on the operating device, open the wireless LAN settings
Enter the SSID and password displayed on this product into the operating device’s wireless
Open a web browser on the connected operating device.
Saving the wireless LAN settings to this product
Enter the URL “http://10.0.0.1/” displayed on this product OLED screen into the address bar of your web browser.
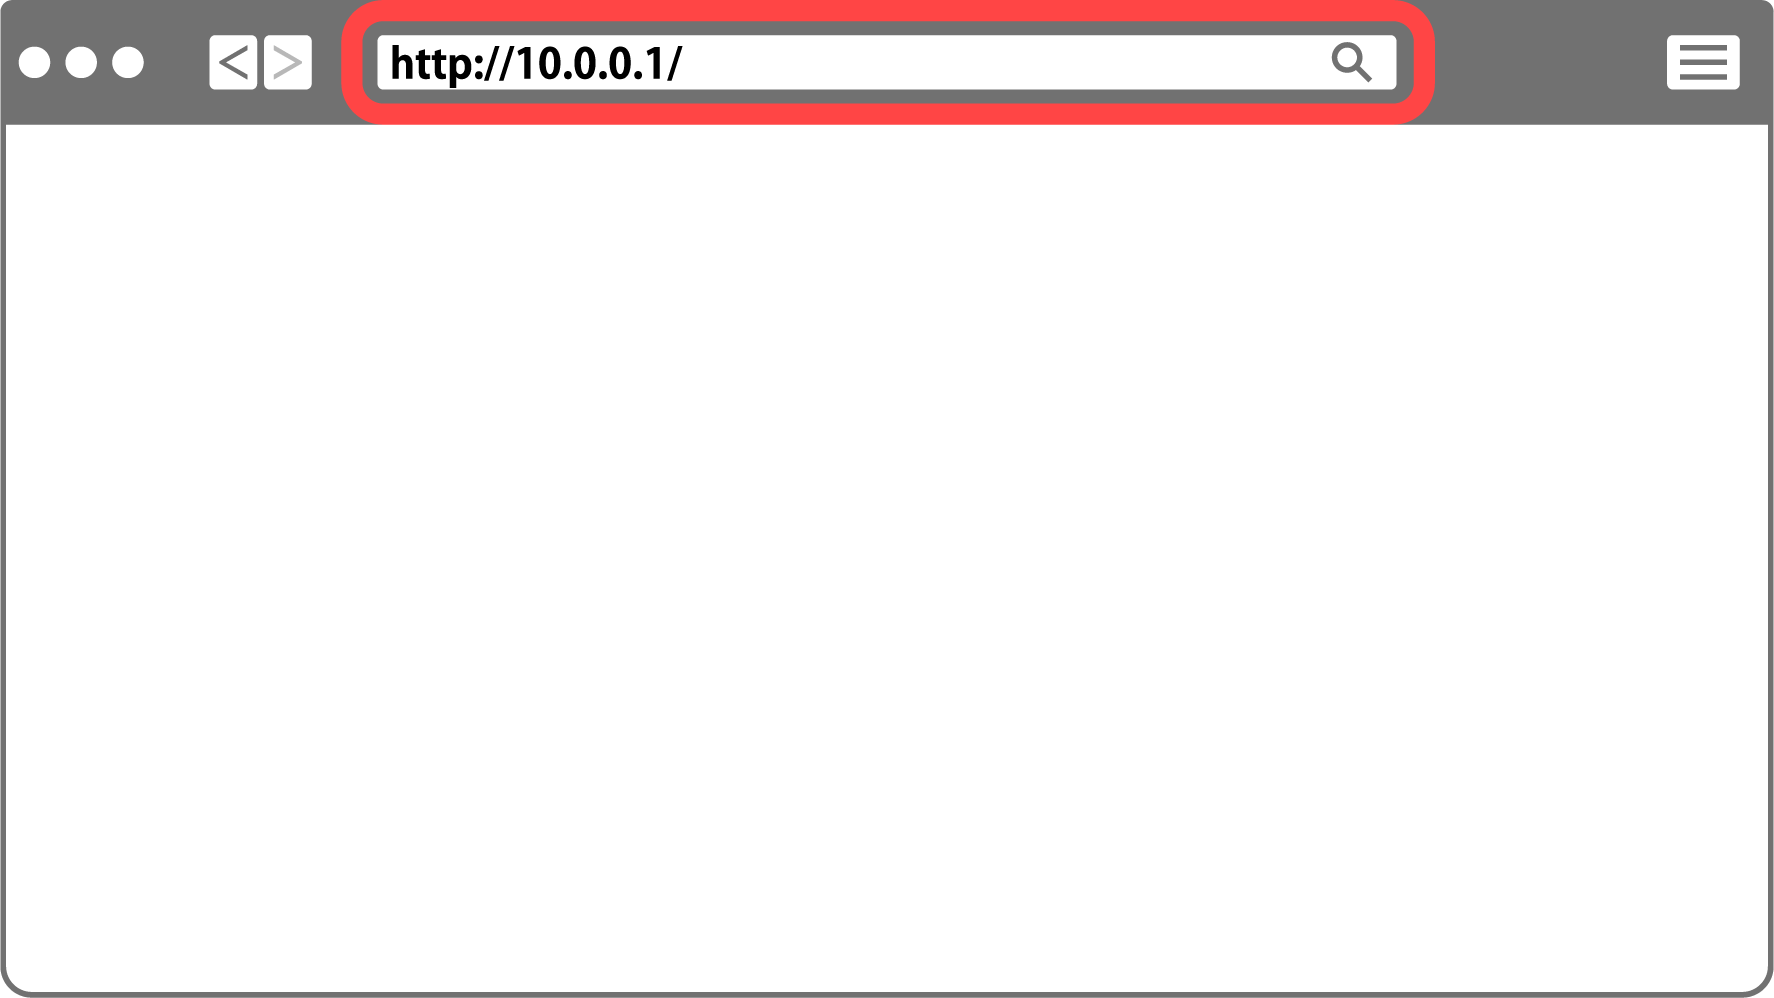
The LiveShell Studio homepage will be displayed.
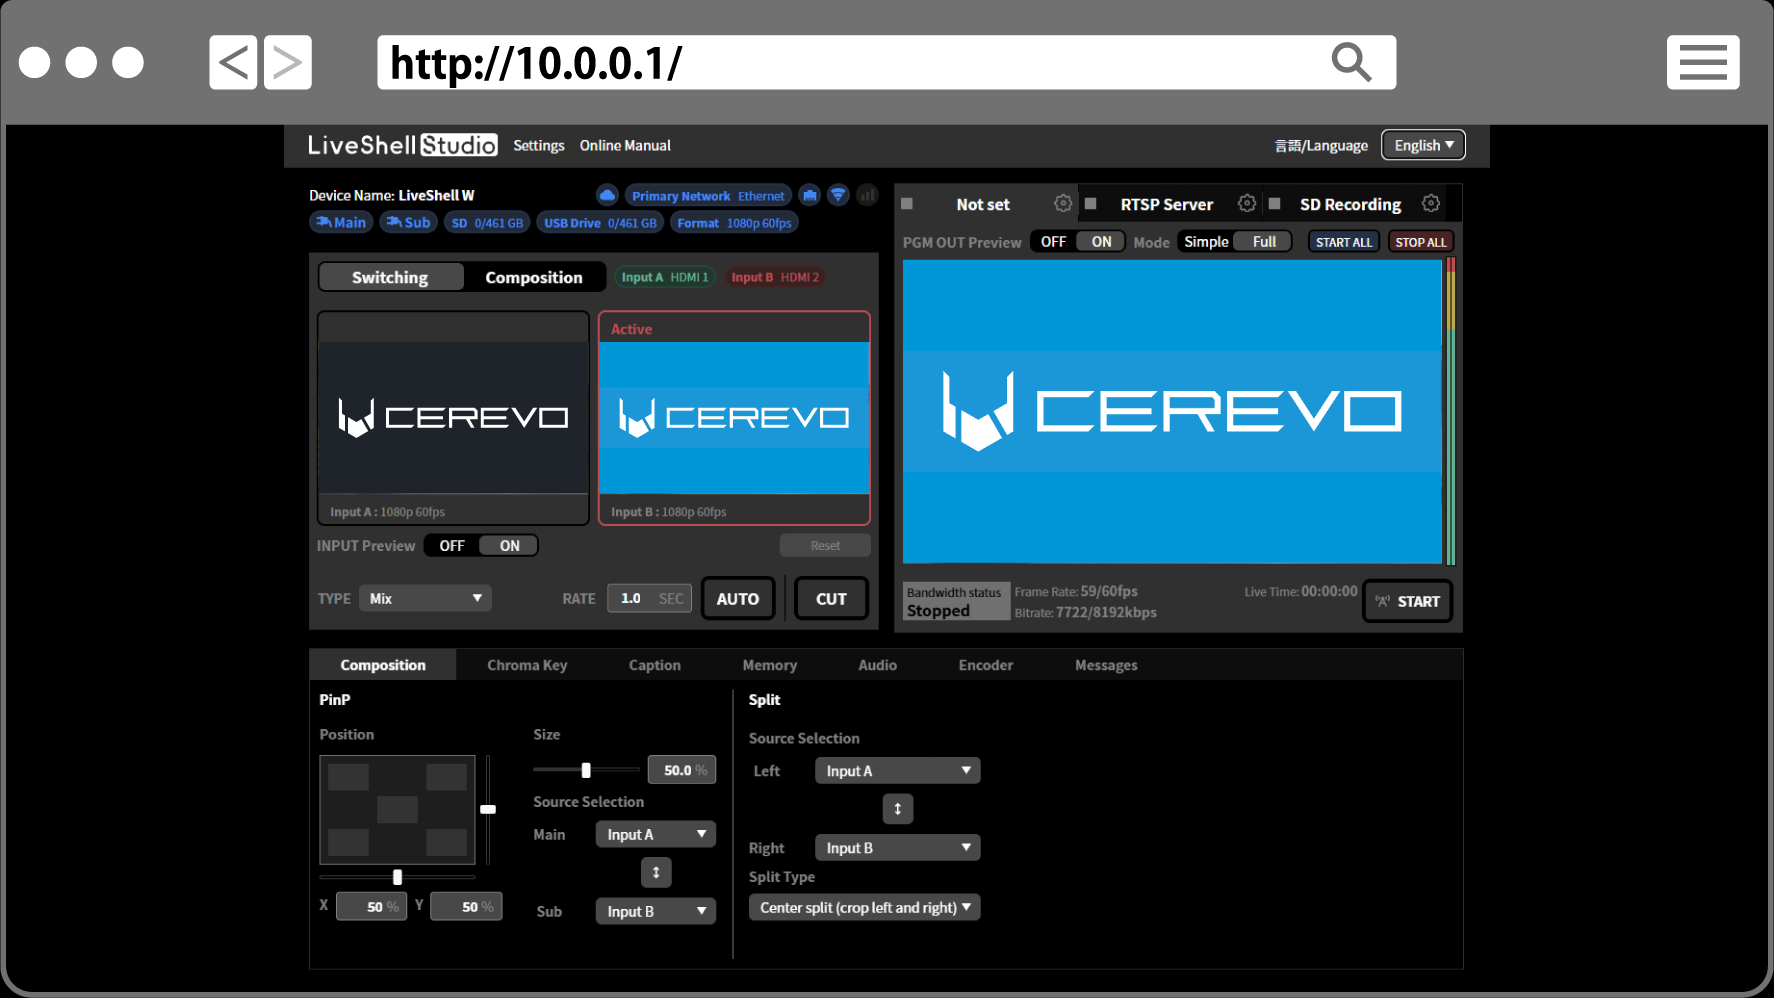
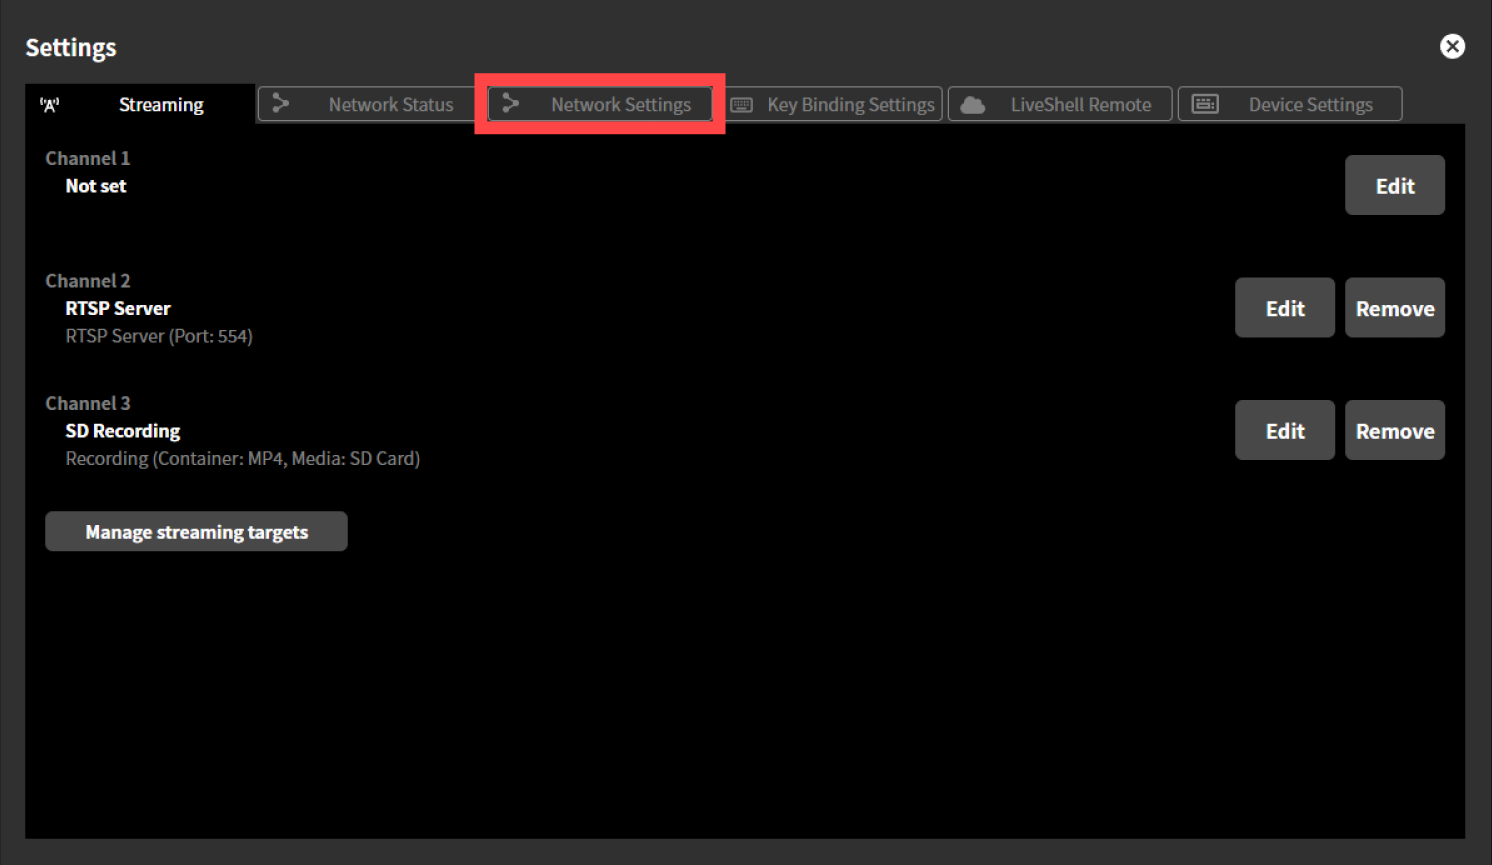
Click “Settings” at the top of the home screen.
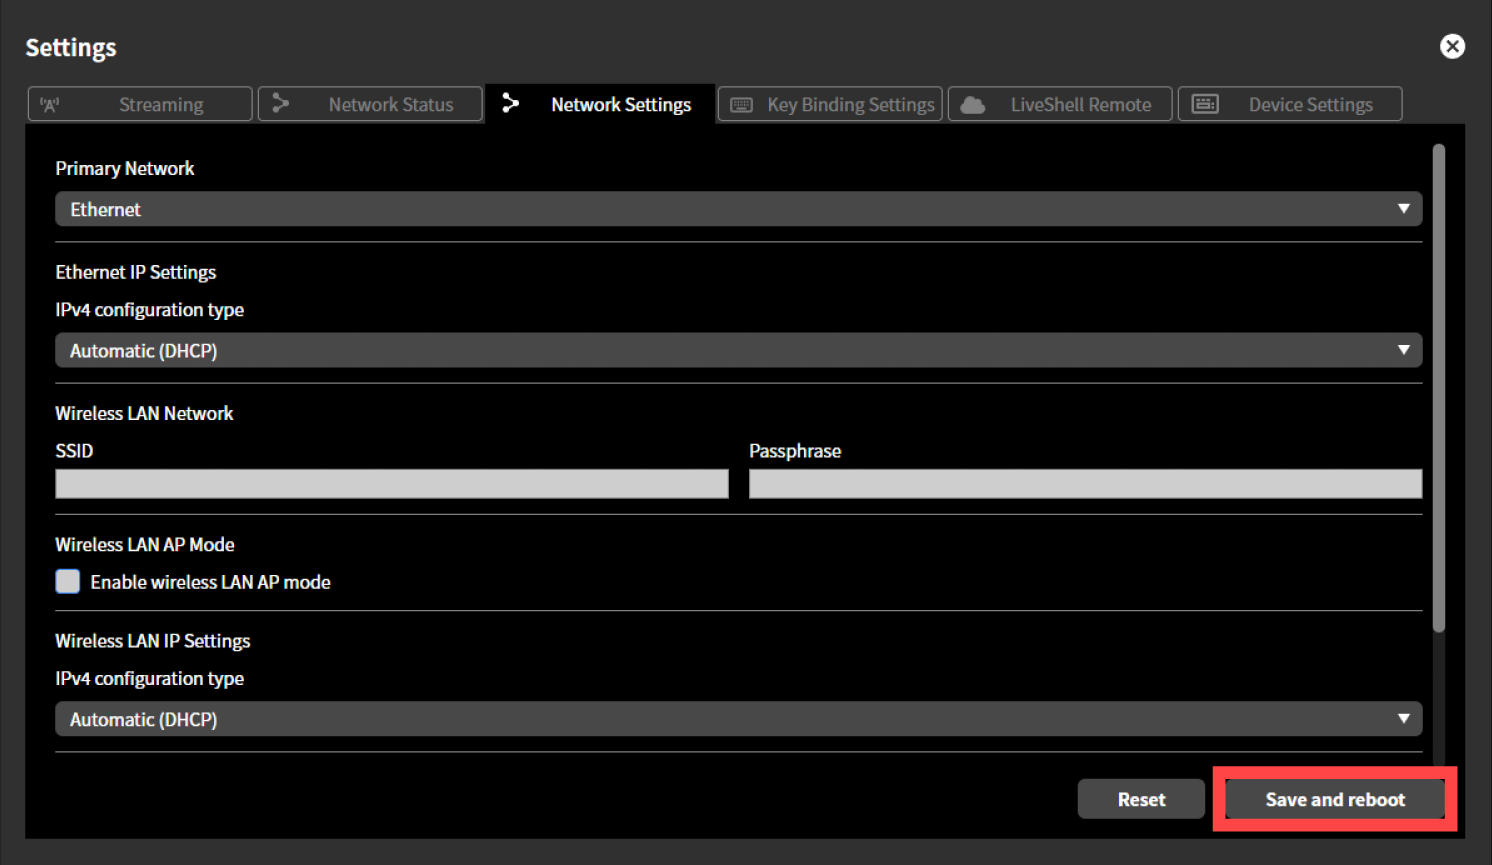
Click the “Network Settings” tab at the top of the “Settings”.
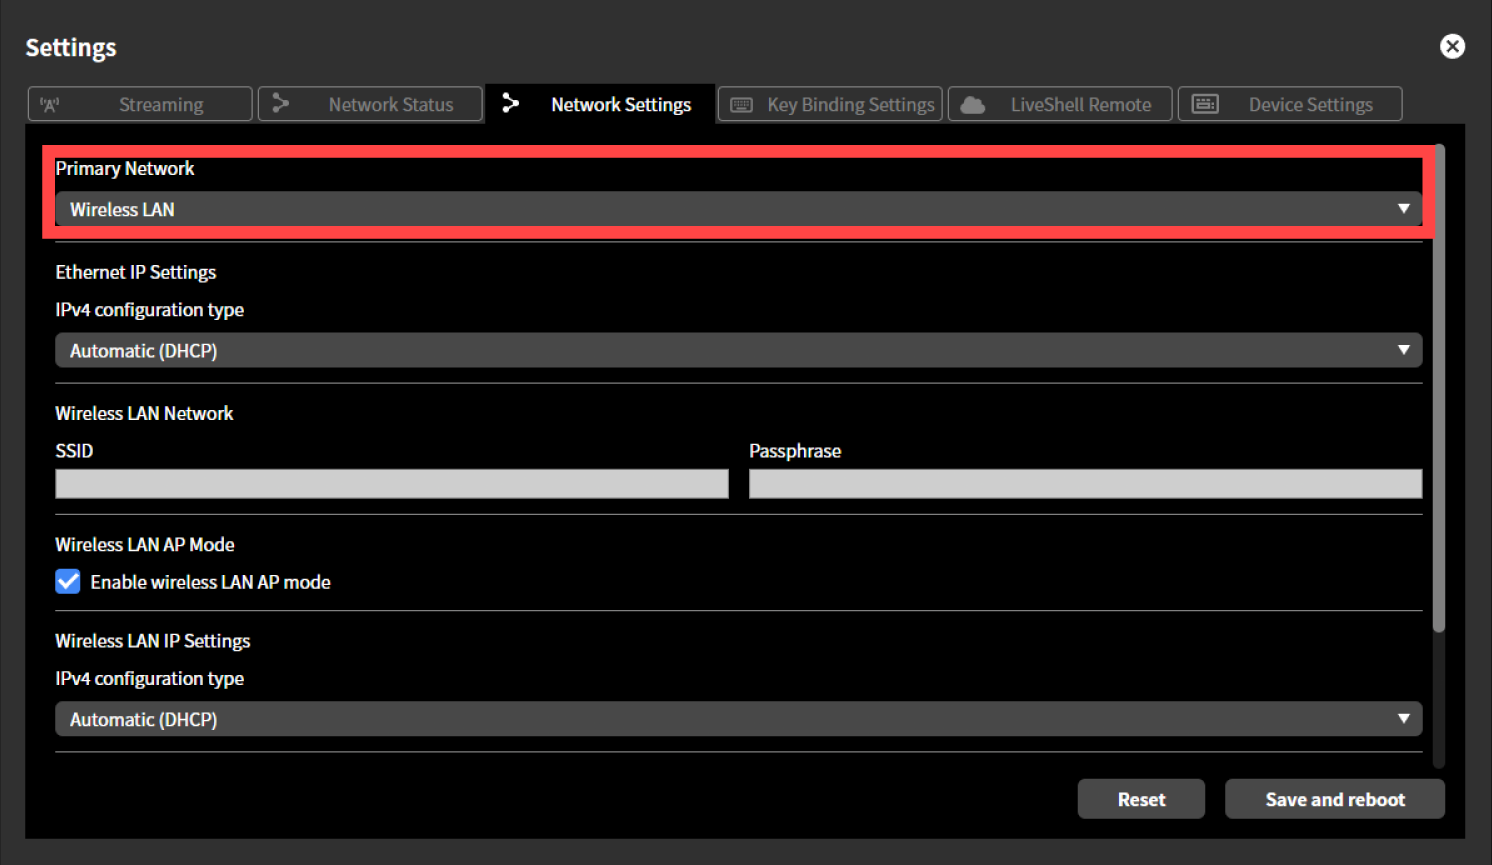
Select “Wireless LAN” from the pull-down menu displayed under “Preferred Network”.
Enter the SSID and passphrase (password) of the wireless LAN network you wish to connect to in the “SSID” and “Passphrase” displayed under “Wireless LAN Network”.Please note that the SSID and passphrase you enter here are not the ones displayed in “View AP Info”.
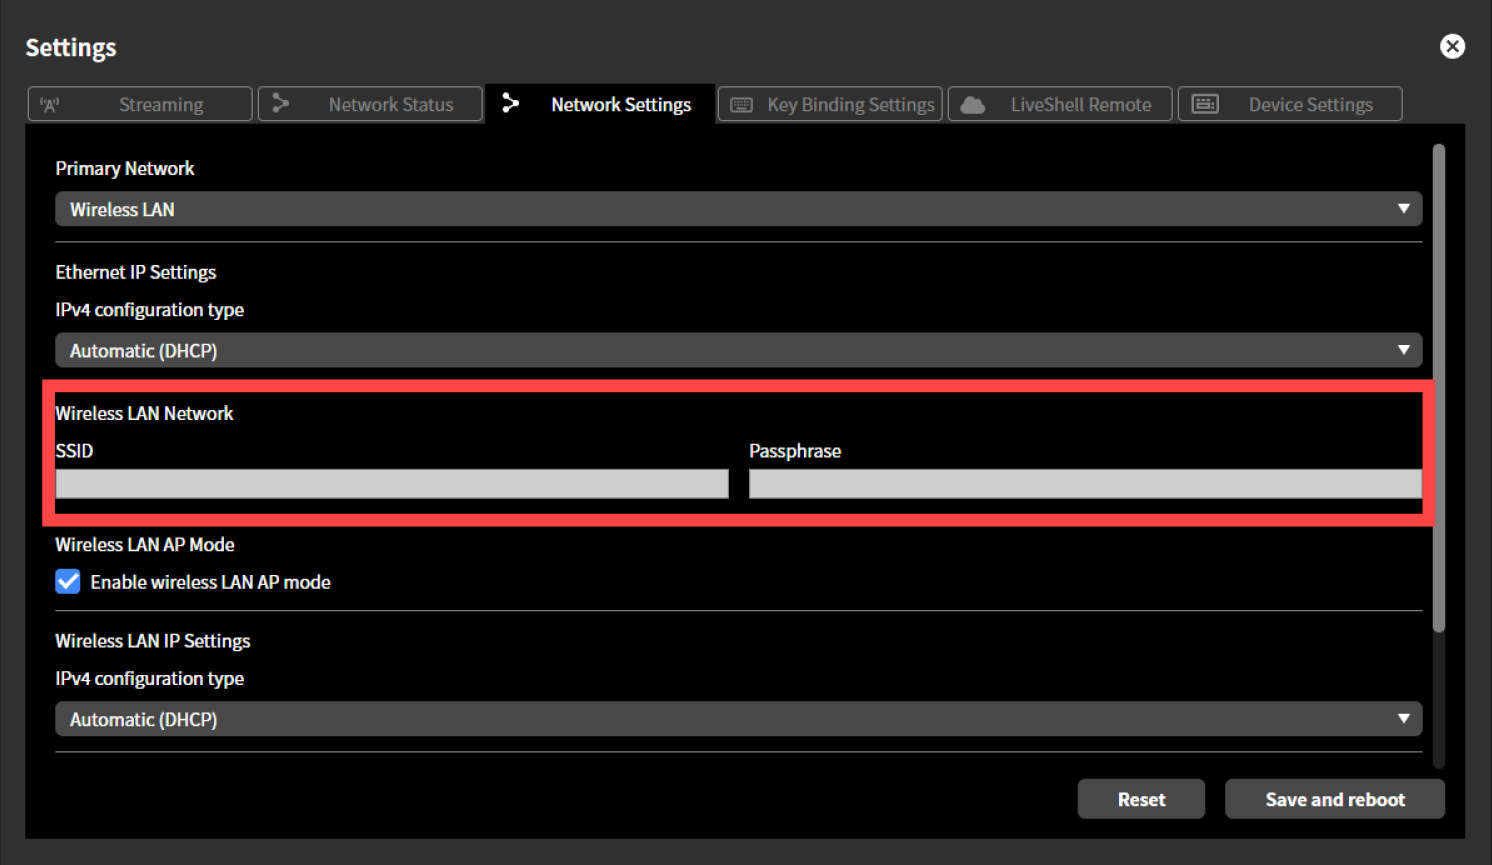
Tip
The SSID and passphrase (password) for your wireless LAN network are often displayed on a label attached to the wireless LAN router.If you have changed them from the default values or are unsure, contact your network administrator.
Under “Wireless LAN AP Mode,” remove the check mark next to “Enable Wireless LAN AP Mode”.

Click “Save and Restart”. This product will automatically restart.