7 Live streaming destination settings/recording settings
This chapter describes settings for live streaming destination and recording.
The live streaming destination settings and recording settings can be configured using LiveShell Studio.It cannot be set using the main unit.
7-1 Supported protocol for network live streaming
The application protocols that can be used for live streaming are listed below.
RTMP and RTMPS
These protocols are used to send video and audio to major live streaming platforms such as YouTube Live.
To live stream via RTMP or RTMPS, you’ll need to create an account on a live streaming platform and obtain an RTMP URL and stream key from the streaming management screen, etc.
Also, recommended settings for encoders will vary depending on the streaming platform. Please check these as well before configuring this product.
RTSP Server Mode
RTSP allows this product to act as a server and distribute video and audio to connected clients.It is a protocol suitable for use on local networks, such as for viewing program output confirmation or for distribution within a facility.
Recording live streaming
You can also set “Recording” as one of the live streaming destinations.In this case, the live streaming will be recorded in MP4 container or MPEG2-TS format to the microSD card in the product.
Note that if you select MP4 as the recording container, recorded data may be corrupted if the product loses power during recording or if the recording termination process is not completed properly.\ If you select MPEG2-TS as the recording container, recorded data up to the time of the event will be retained even if a similar event occurs, such as a power loss during recording.
Only SD, SDHC, and SDXC cards formatted in FAT32 or exFAT can be used.
MPEG2-TS over UDP
MPEG2-TS over UDP is a mode in which video and audio multiplexed as an MPEG2 Transport Stream are sent without any procedures as a UDP datagram payload. This protocol is suitable for transmitting video to video decoders that can receive this protocol.
7-2 Setting up a new live streaming destination
To set up a new live streaming destination, follow the steps below.
Click the “Settings (gear icon)” button displayed at the top of the desired channel.
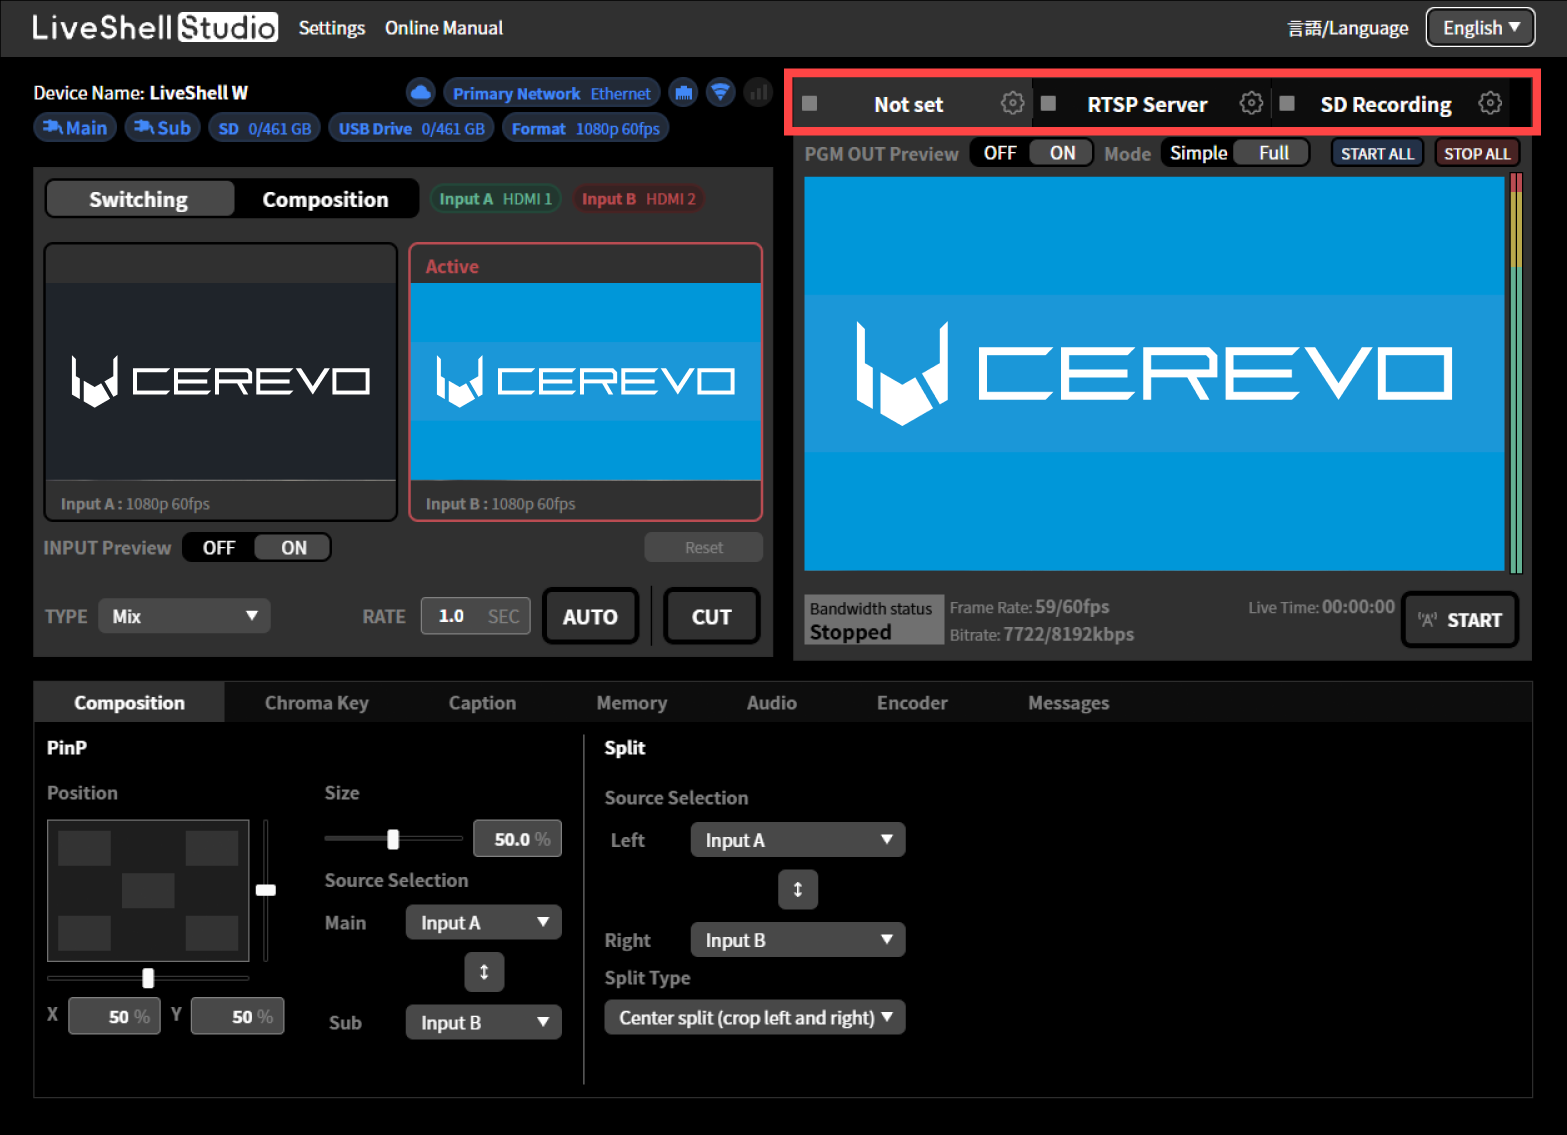
On the “Settings” screen that appears, click the “Edit” button for the desired channel in the “Streaming” tab.
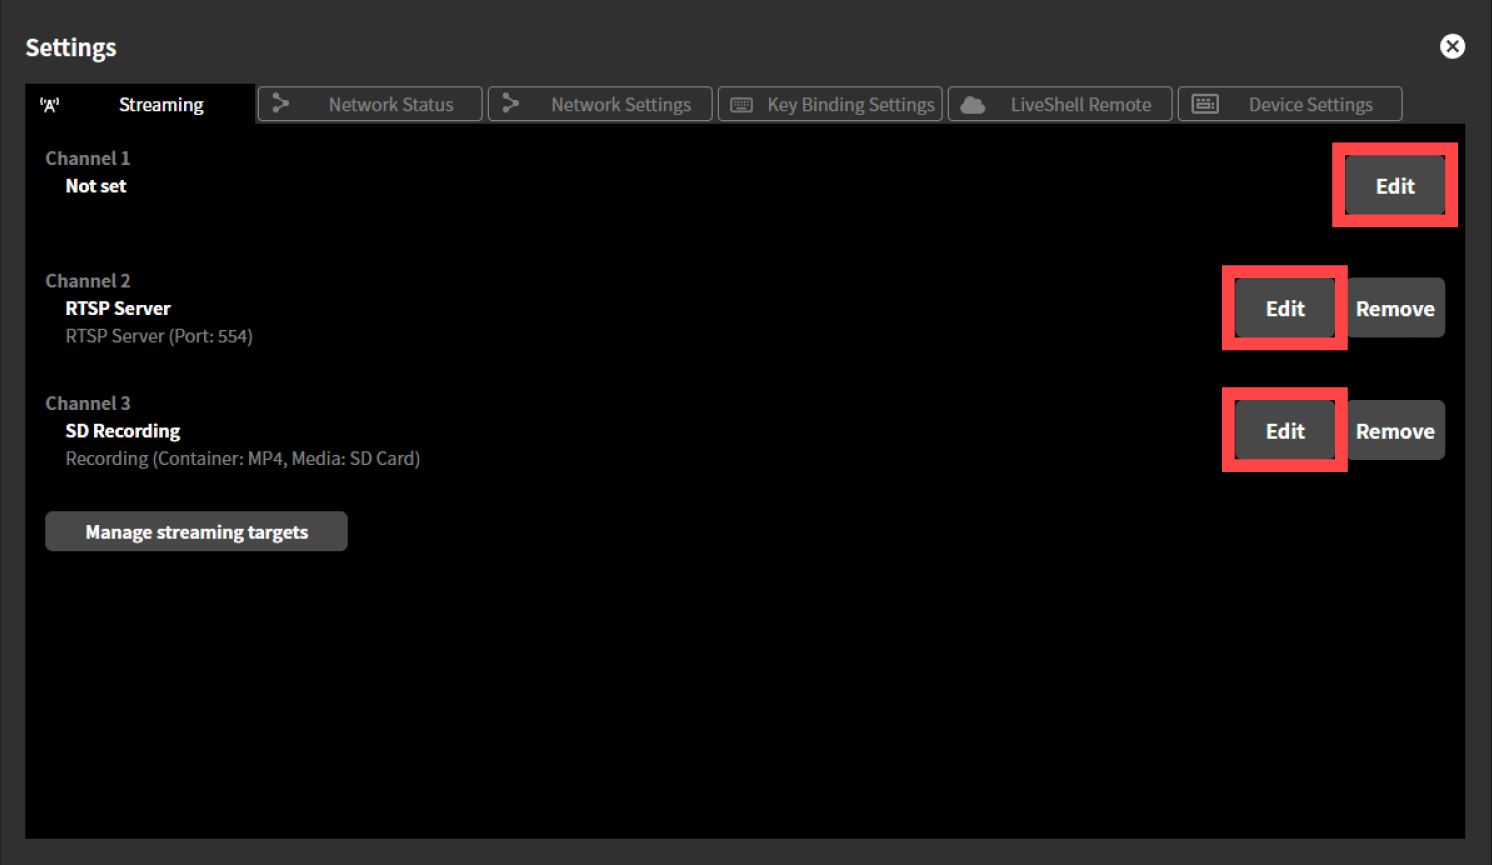
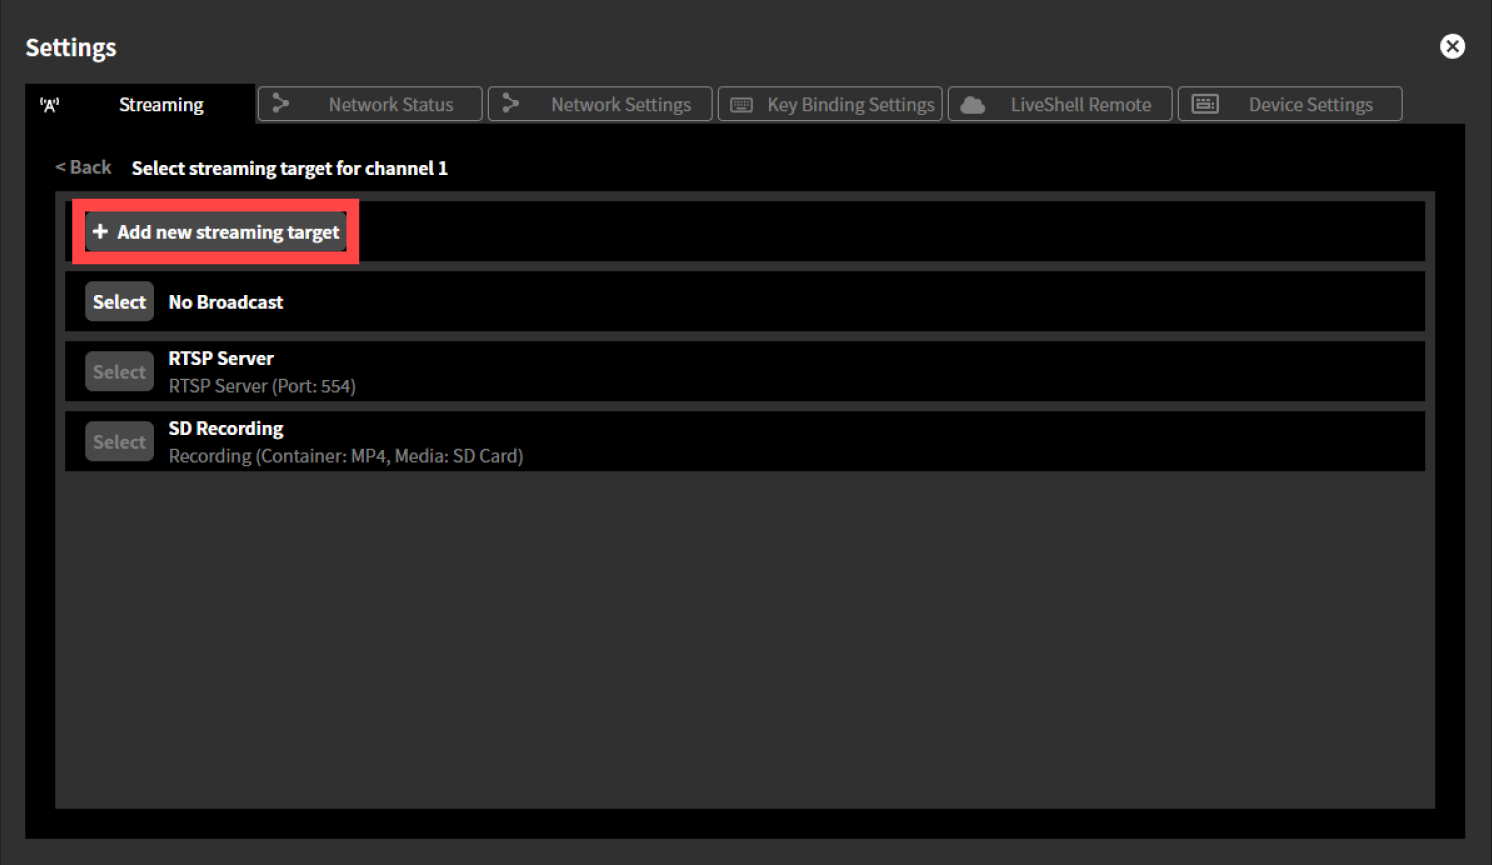
Click “+ Add new streaming target.”
Enter a display name of your choice in the “Display name” text box. The information entered here will not be reflected on the actual live streaming platform, and will only be used for display within this product.
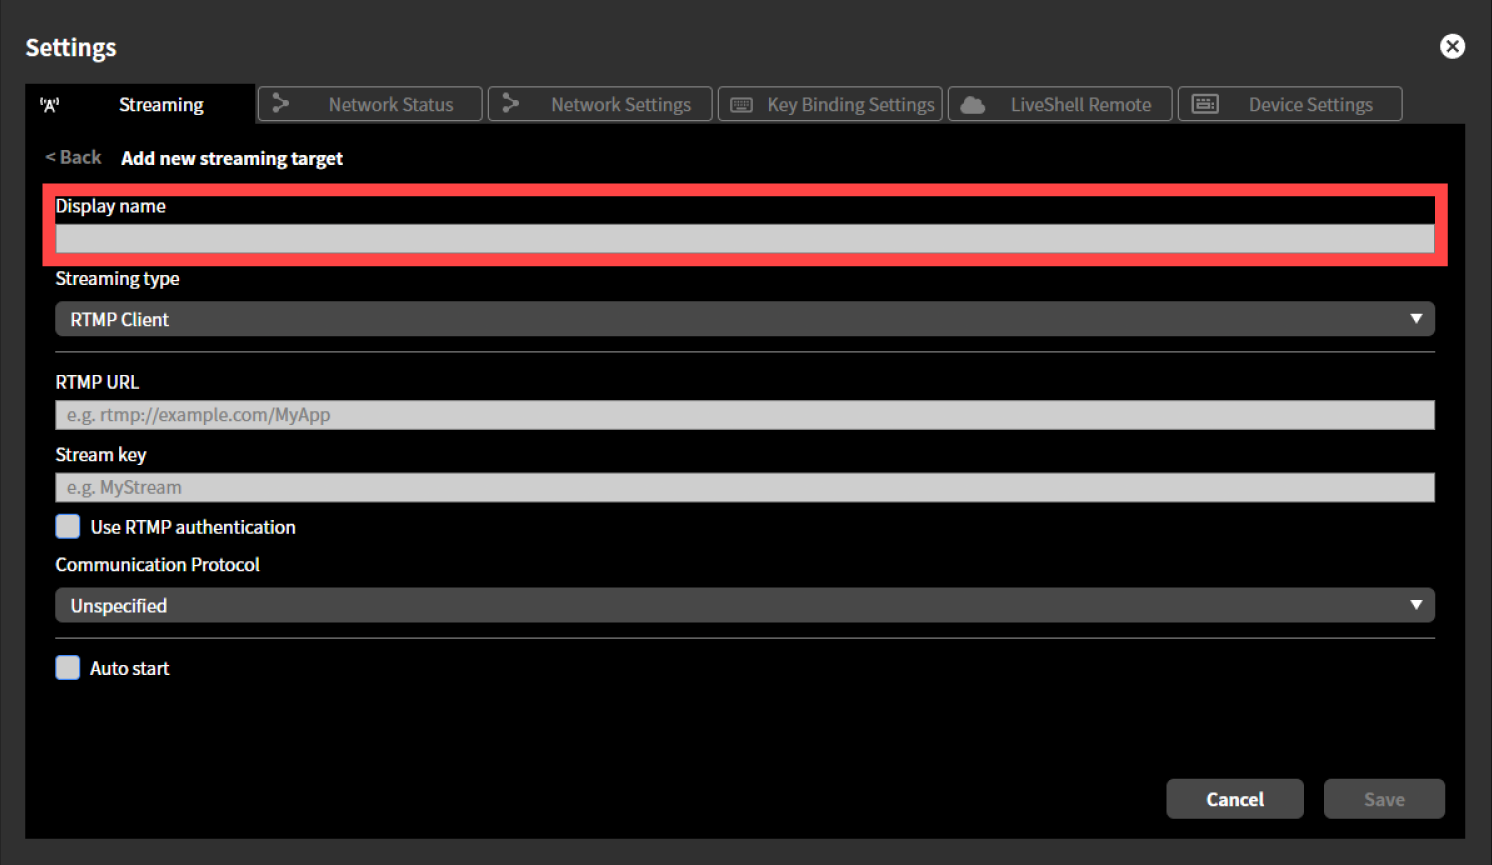
Select the desired protocol from the “Destination Type” drop-down menu.
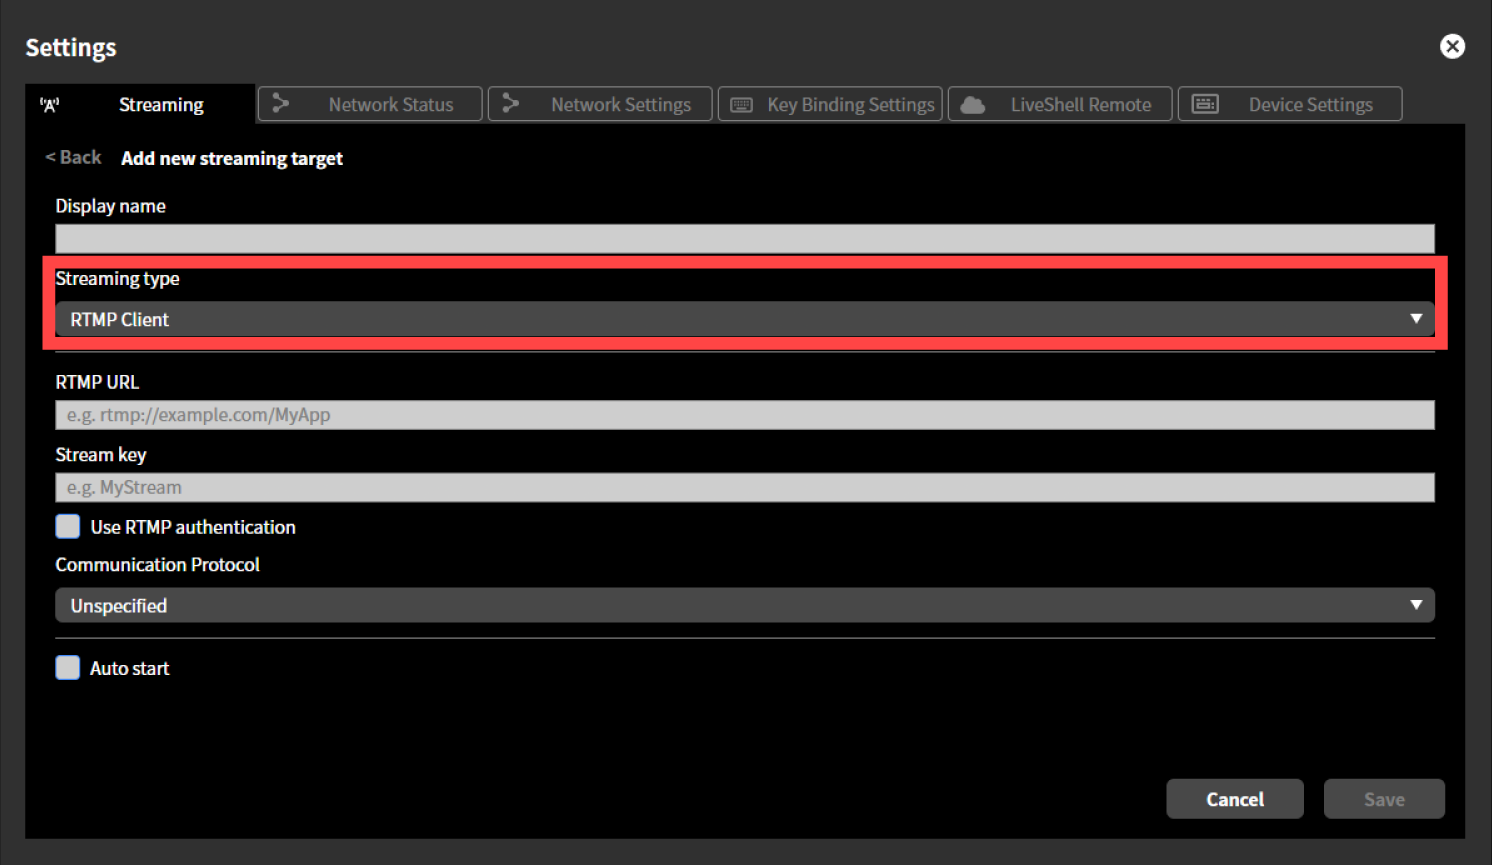
Enter desired values into the input fields for each setting that appears. The setting values you need to enter will vary depending on the live streaming destination type. Please refer to the individual steps below for each.
For RTMP clients
→ RTMP clientsFor RTSP servers
→ RTSP server settingFor recording
→ Live streaming recording destination settingFor MPEG2-TS over UDP
→ MPEG2-TS over UDP setting
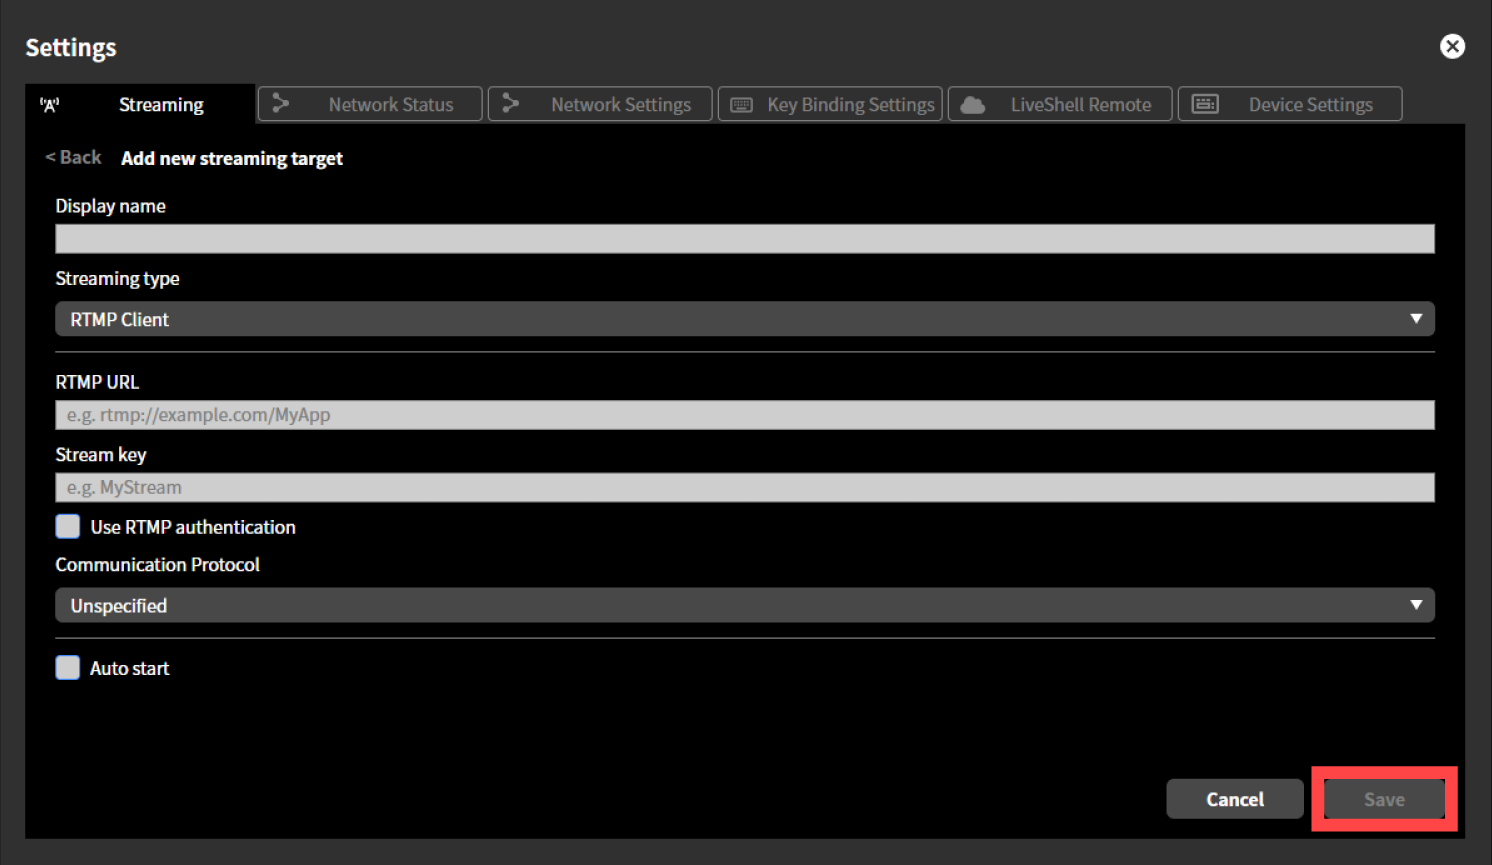
Click “Save”.
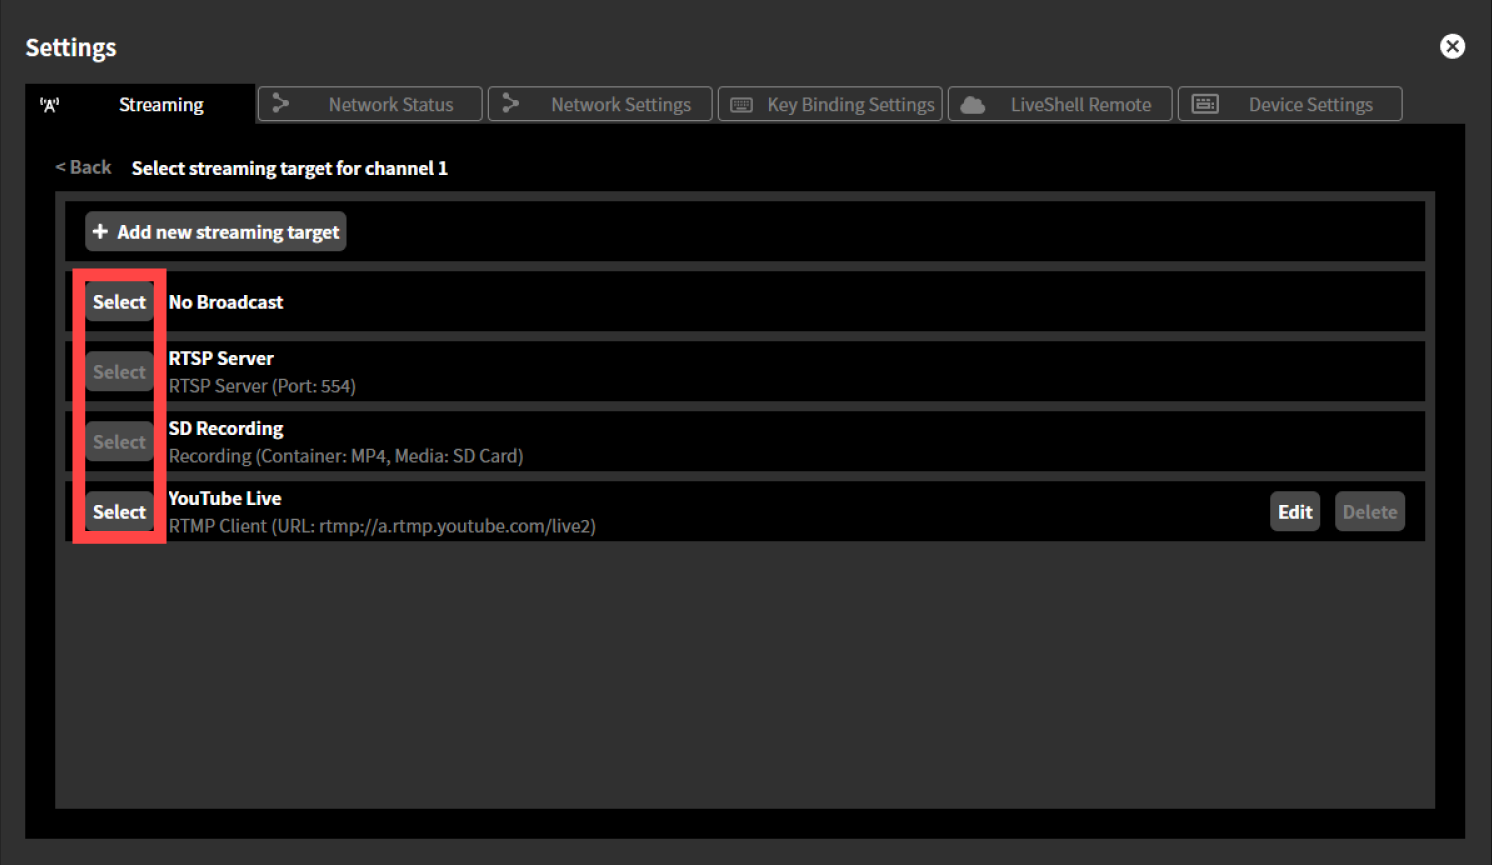
Click the “Select” button to the left of the display name of the live streaming destination setting you just saved to complete the streaming settings for your desired channel.
Settings for live streaming destination types
RTMP clients
For the “RTMP Client” live streaming destination type, you must set the following items.
In “RTMP URL,” enter the RTMP URL obtained from the live streaming platform.
In “Stream Key,” enter the stream key obtained from the live streaming platform.
If you want to use RTMP authentication, check “Use RTMP Authentication” and enter any desired values in “Username” and “Password.”
In “Communication Protocol,” specify the network layer protocol. You can specify Unspecified, IPv4 Only, or IPv6 Only. Normally, you should select “Unspecified.”
If “Auto Start” is checked, streaming to this destination will automatically begin when the product starts up.
RTSP server setting
For the “RTSP server” live streaming destination type, you must set the following items.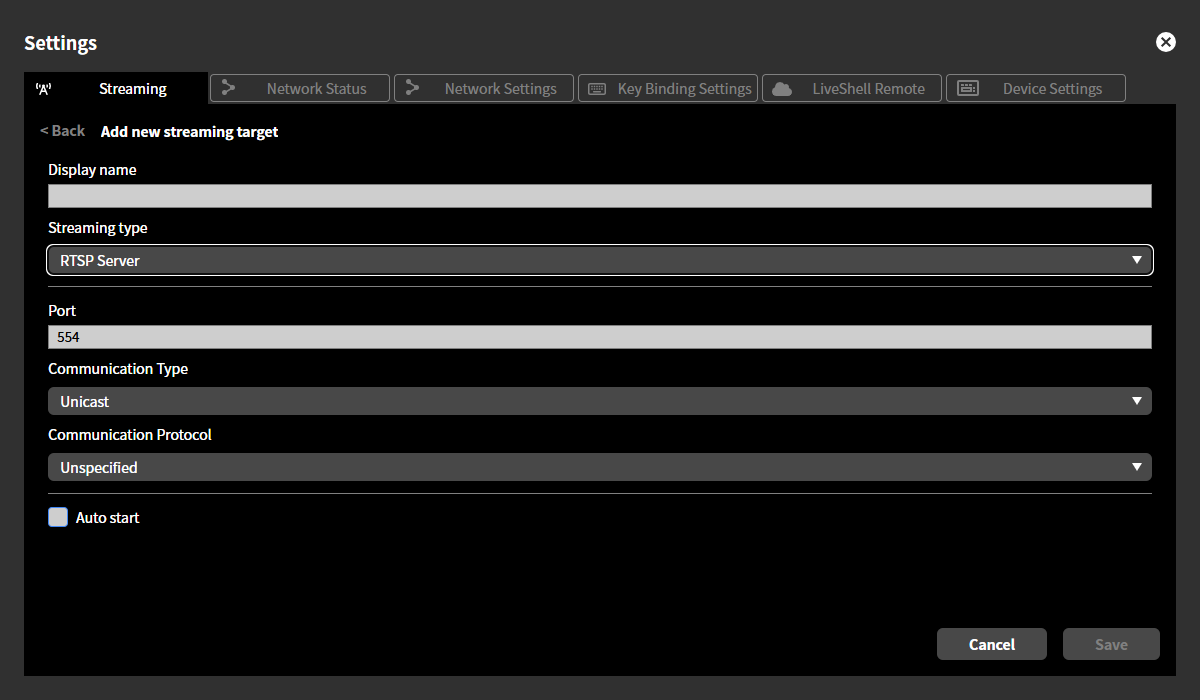
In “Port number”, enter the TCP port on which the RTSP server listens. Normally, this should be “554”.
In “Communication method”, select whether to send media packets via unicast or multicast. Normally, select “Unicast”.
If you select multicast, enter the Time To Live value for multicast distribution in “Multicast TTL”.In “Communication protocol”, specify the network layer protocol. You can specify Unspecified, IPv4 only, or IPv6 only. Normally, select “Unspecified”.
In “Communication Protocol,” specify the network layer protocol. You can specify Unspecified, IPv4 Only, or IPv6 Only. Normally, you should select “Unspecified.”
If “Auto start” is checked, the RTSP server will start automatically when this product is started.
You cannot set an RTSP server for multiple channels. Only one channel can be set as an RTSP server.
Live streaming recording destination setting
For the “Recording” live streaming destination type, you must set the following items.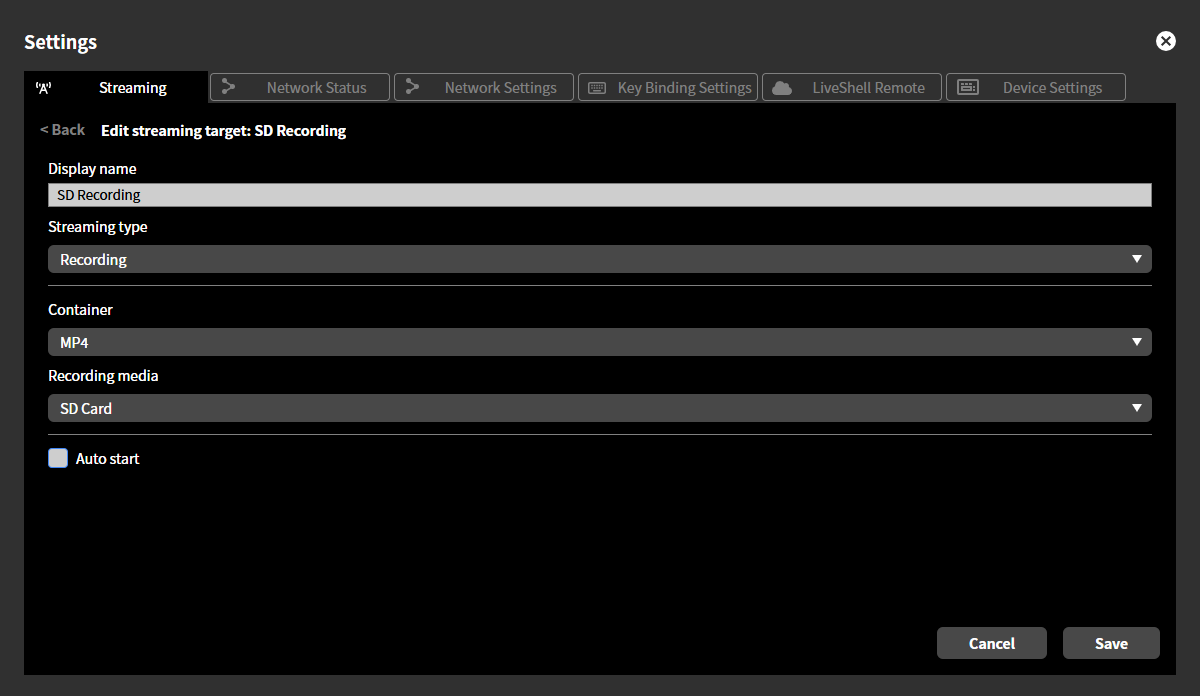
In “Container,” specify the container format to use when saving the stream. Choose either “MP4” or “MPEG2-TS.”
In “Destination Media,” specify the recording media to record to. You can choose either “SD Card” or “USB Drive.”
Depending on this setting, connect the recording media to the SD card slot or USB port on the front of the unit.
If “Auto Start” is checked, recording will start automatically when the product is turned on.
You cannot set multiple channels to record. Only one channel can be set to record.
MPEG2-TS over UDP setting
For the “MPEG2-TS over UDP” live streaming destination type, you must set the following items.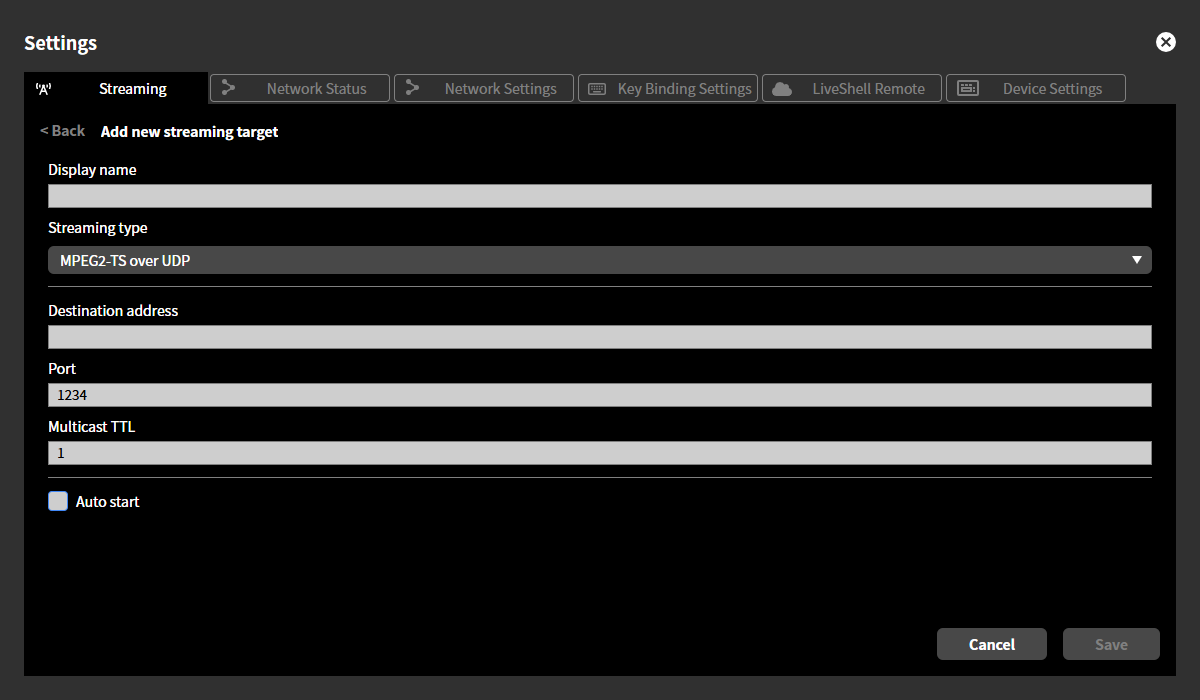
In “Destination Address,” enter the destination IP address to which the UDP datagram will be sent.
In “Port Number,” enter the destination port number for the UDP datagram to be sent.
In “Multicast TTL,” enter the Time To Live value for multicast distribution.
If “Auto Start” is checked, streaming to this destination will automatically begin when the product starts up.
7-4 Changing the live streaming destination
To change the live streaming destination, follow the steps below.
Click the “Settings (gear icon)” button displayed at the top of the desired channel.
On the “Settings” screen that appears, click the “Edit” button for the desired channel in the “Streaming” tab.
To complete the streaming settings for the channel, click the “Select” button to the left of the display name of the streaming destination setting you want to change.
7-5 Deleting the live streaming destination
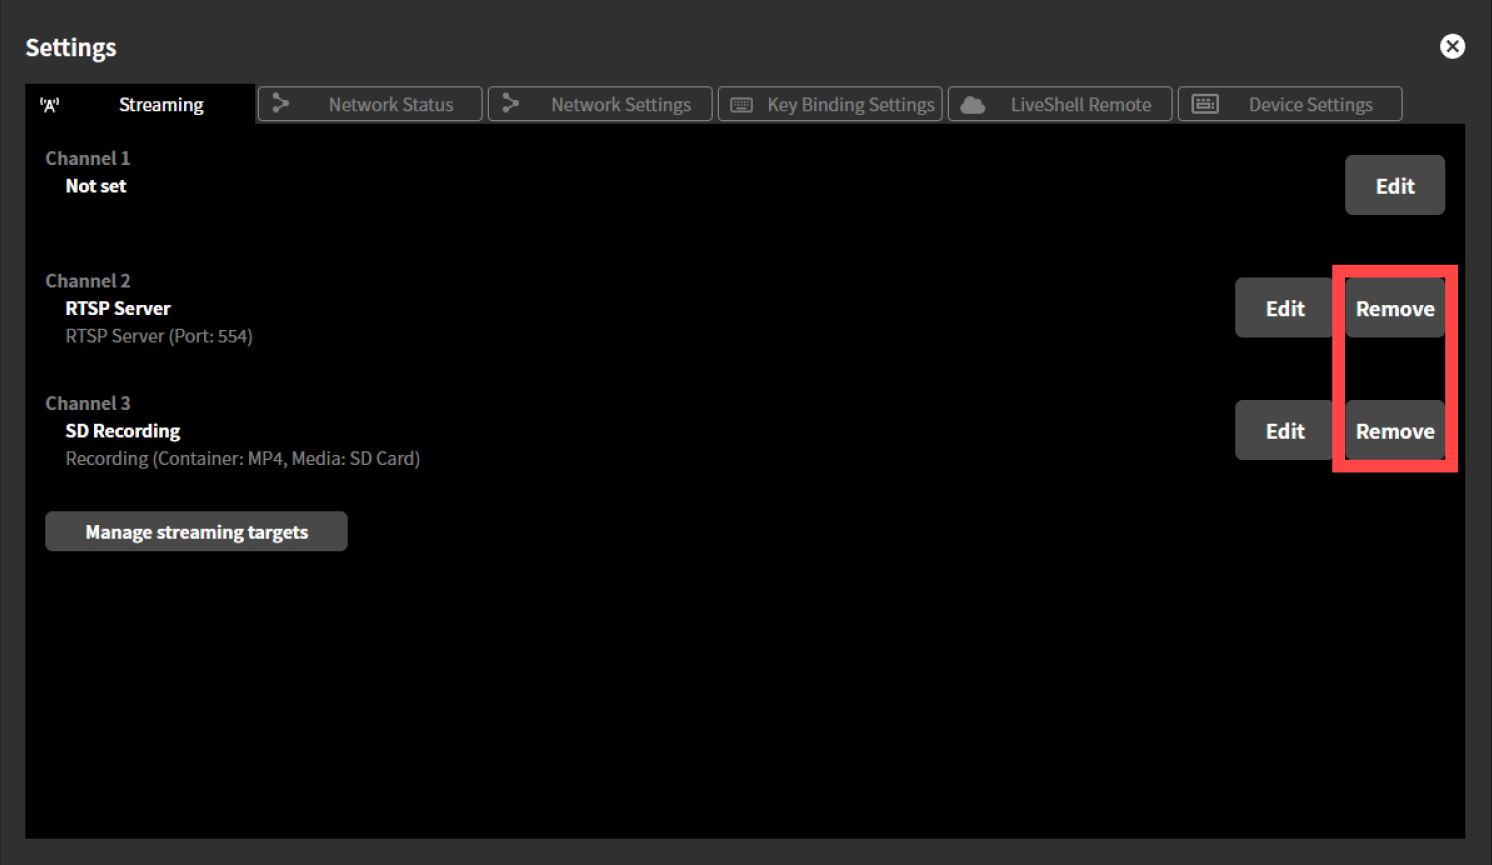
Deleting the live streaming destination setting for a channel
To delete the live streaming destination settings you’ve set for a channel, follow the steps below.
Click the “Settings” (gear icon) button at the top of the channel you want to set up.
Click the “Remove” button for the channel you want to delete in the “Streaming” tab on the “Settings”. This will delete the live streaming destination settings for that channel.
Deleting the live streaming destination setting
To delete the live streaming destination settings stored on this product, follow the steps below.
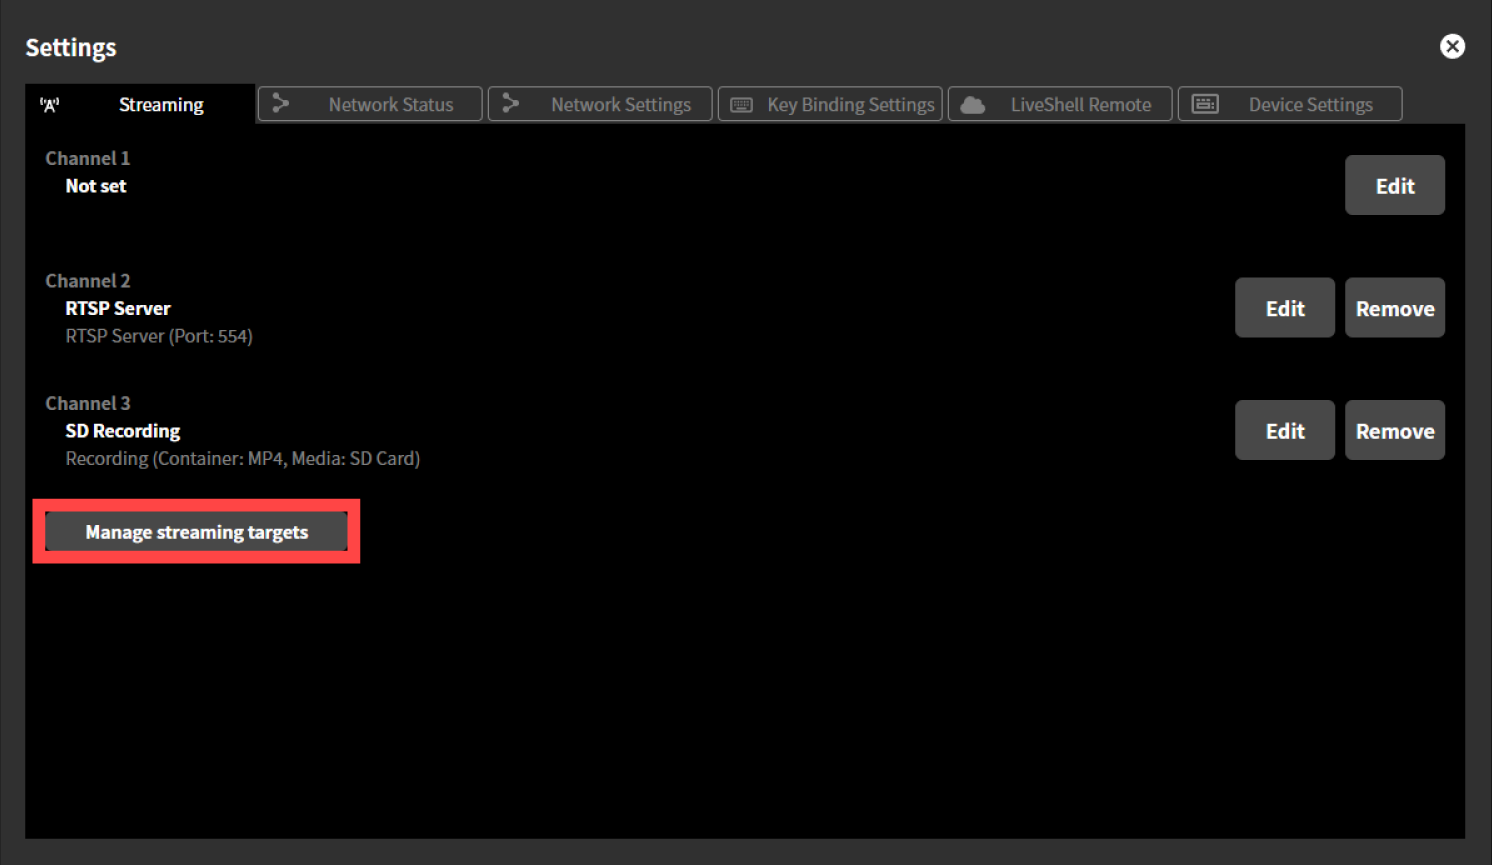
Click “Settings” at the top of the home screen.
Click the “Manage streaming targets” button in the “Live Streaming” tab on the “Settings” screen.
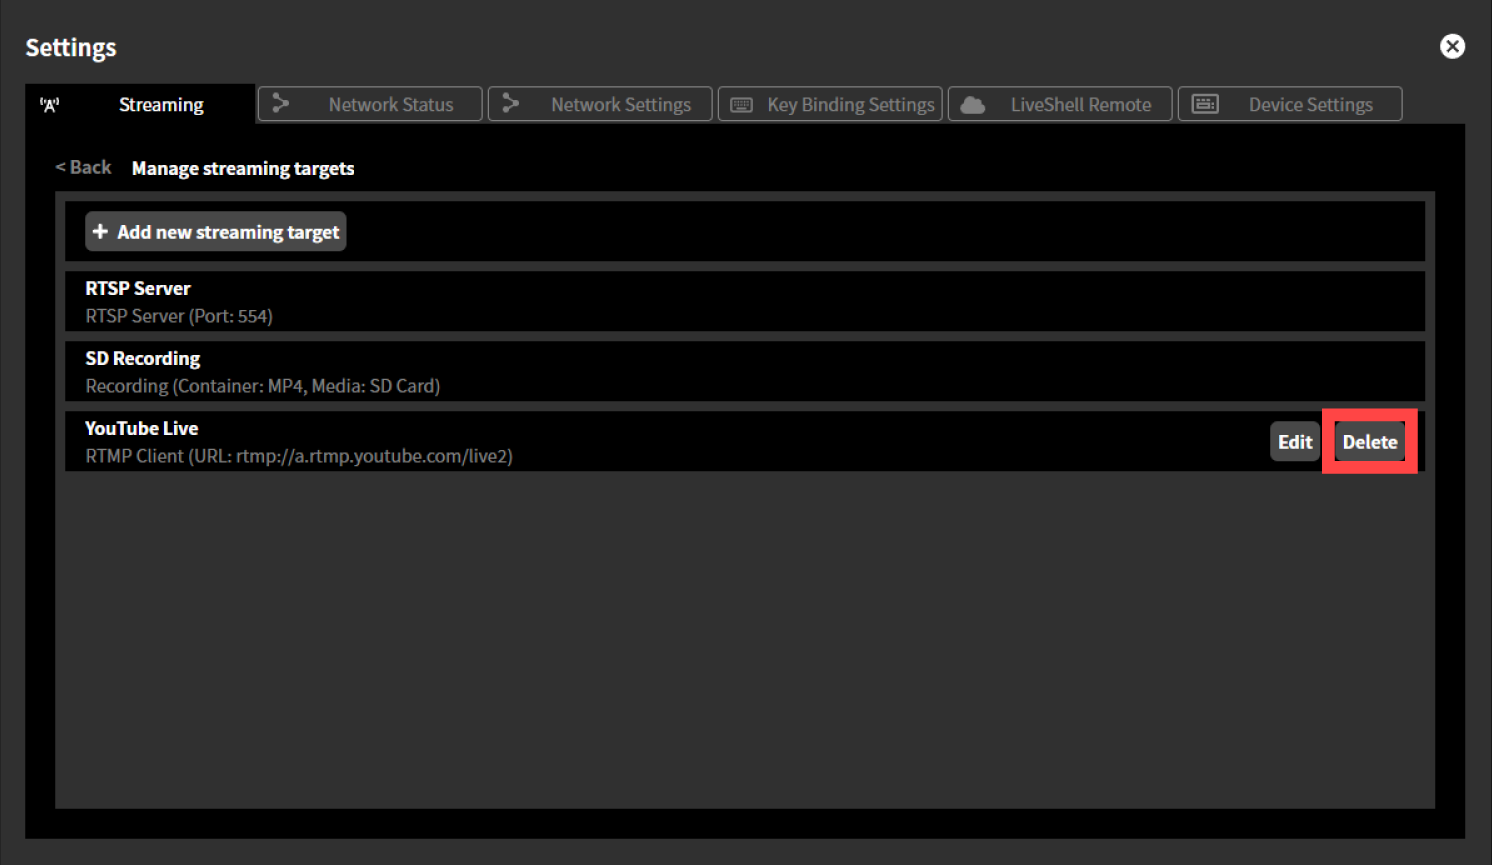
Click the “Delete” button for the destination setting you want to delete. The destination setting will be deleted.
7-6 Start/Stop live streaming/recording
To start or stop live streaming or recording for the configured channel, follow the steps below.This can be done from LiveShell Studio or the device itself.
Start live streaming/recording
Using LiveShell Studio
Click the “Start Streaming” button displayed on the channel you want to start streaming on.
Using the Main Unit
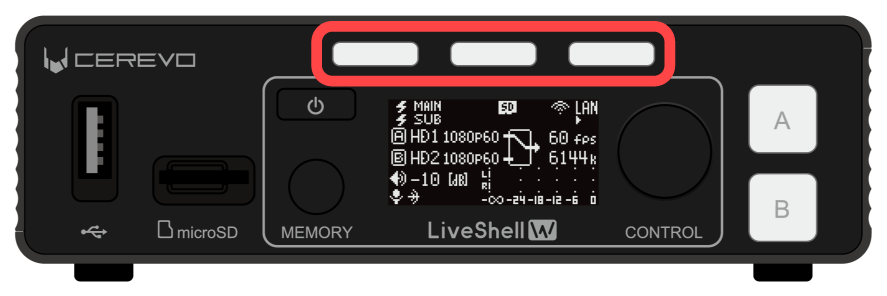
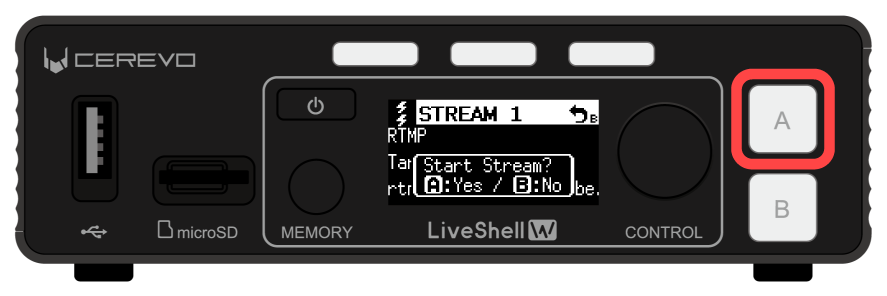
Push the “3 Streaming Button Indicator” for the channel you want to start.
Check the displayed content on the OLED screen and push the “3 Streaming Button Indicator” again for the channel you want to start.
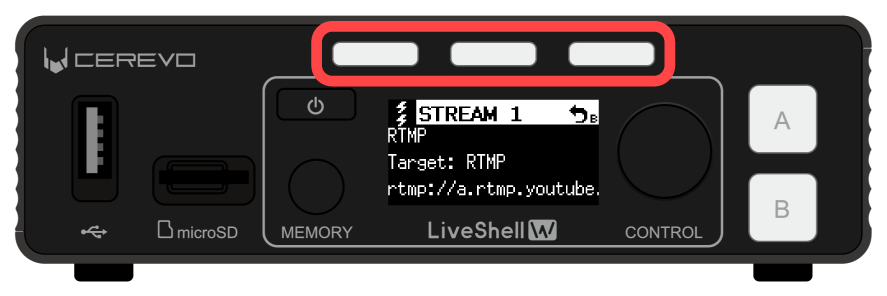
When “Start Stream?” is displayed on the OLED screen, push the Video Select Button A to begin streaming.
Stopping the live streaming/recording
Using LiveShell Studio
Click the “Stop Streaming” button displayed on the channel you want to stop live streaming.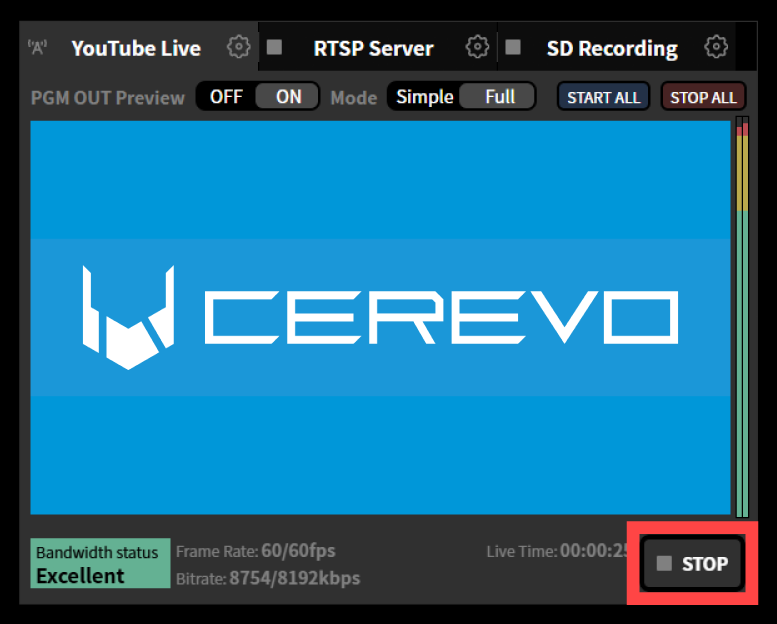
Using the Main unit
Push the “3 Streaming Button Indicator” for the channel you want to stop.
Check the displayed content on the OLED screen and push the “3 Streaming Button Indicator” again for the channel you want to start.
When “Stop Stream?” is displayed on the OLED screen, push the Video Select Button A to stop live streaming.
