13 FAQ
This chapter describes frequently asked questions and troubleshooting for this product.
13-1 Frequently Asked Questions
About usage environment and configuration.
I want to know what video devices (cameras, etc.) can be connected.
This product supports HDMI video input.
Any video device (camera, computer, etc.) that supports HDMI output can be connected to this product and used (although operation is not guaranteed with all devices).
Please note that video devices that only output video formats (resolutions and frame rates) that this product does not support cannot be used.Please refer below for video formats supported by this product.
→System video format
Does this product support HDCP?
No, this product does not support HDCP.
Can I use an HDMI splitter or video converter?
This product is designed to be connected directly to the video device itself via an HDMI cable.
If you connect an HDMI splitter or video converter or other device between the two devices, the video and audio may not be recognized correctly by this product.
Problems caused by connecting the above mentioned devices are not covered by the warranty and cannot be handled by our company.
What media can be used for recording?
This product can use two types of media for recording: microSD cards and USB drives.
Details of each type of media that can be used are:
icroSD cards”
SD, SDHC, and SDXC cards
FAT32 or exFAT formatted
USB flash drive
FAT32 or exFAT formatted
Can I operate this product remotely?
Remote operation is possible by creating a network environment such as a VPN and connecting this product to an operating device (PC, tablet, smartphone, etc.).
If you are unable to create a network, you can use LiveShell Remote, a subscription cloud service, to operate this product remotely.
For more information about LiveShell Remote, please see below.
→8 Remote control setting with LiveShell Remote
About Setup
How do I check the firmware version?
To check the current firmware version, follow the steps below.
This can be done from LiveShell Studio or the product itself.
Using LiveShell Studio
Click “Settings” on the top screen.
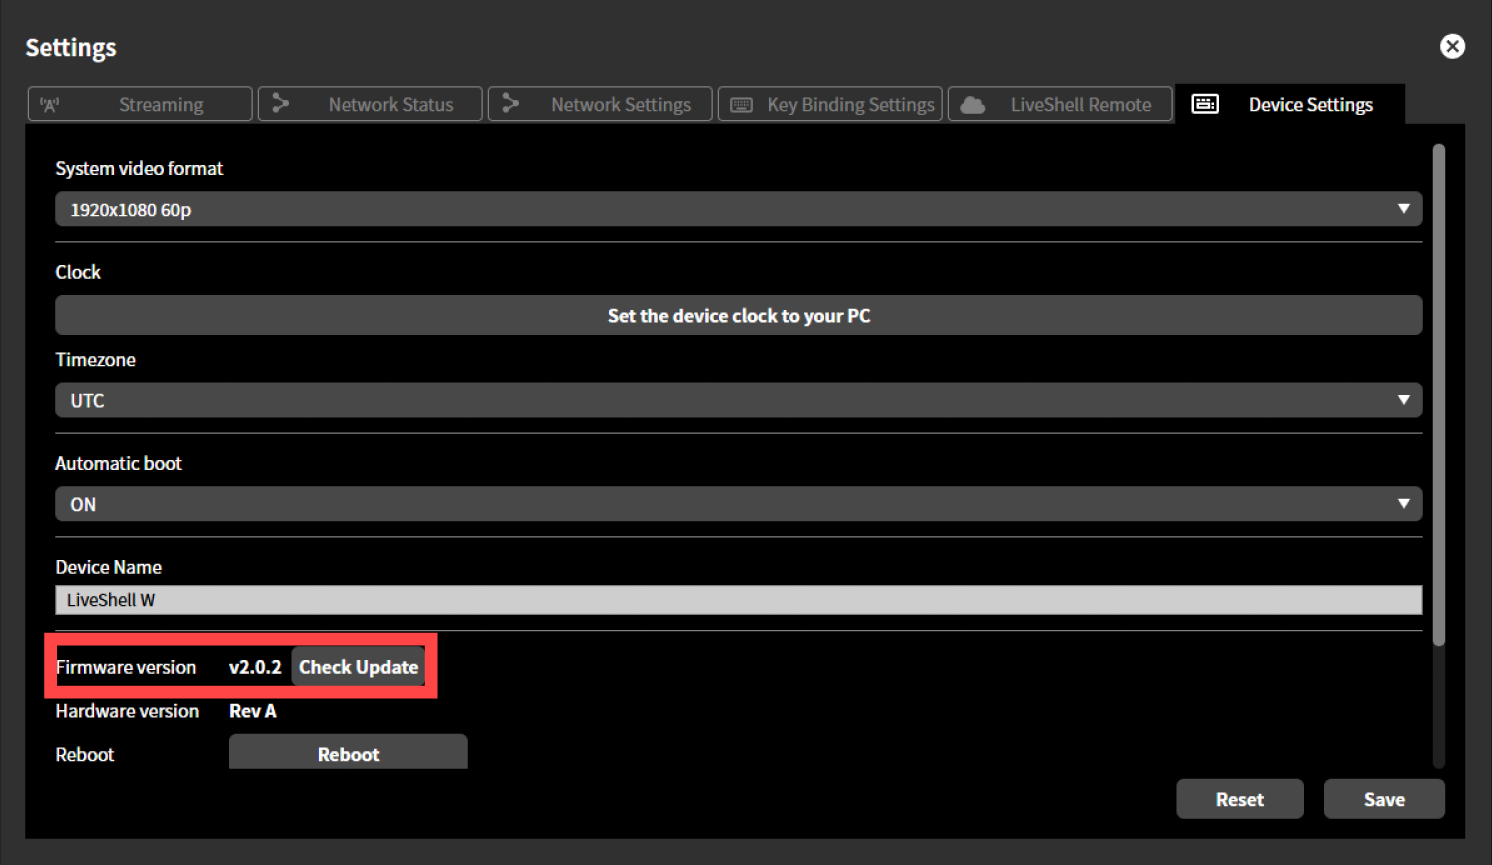
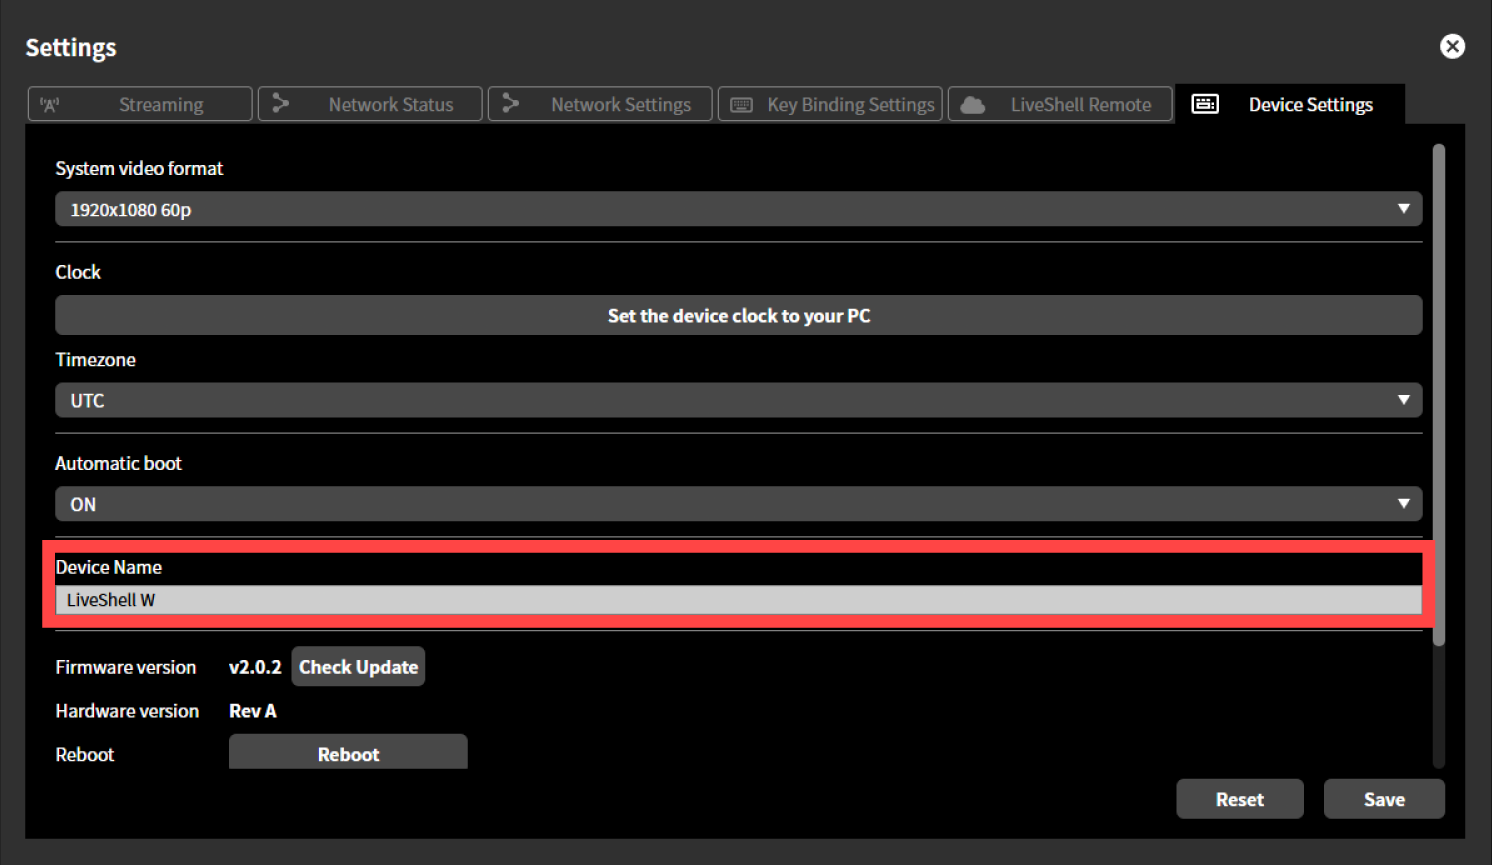
Click the “Device Settings” tab at the top of the “Settings” screen.
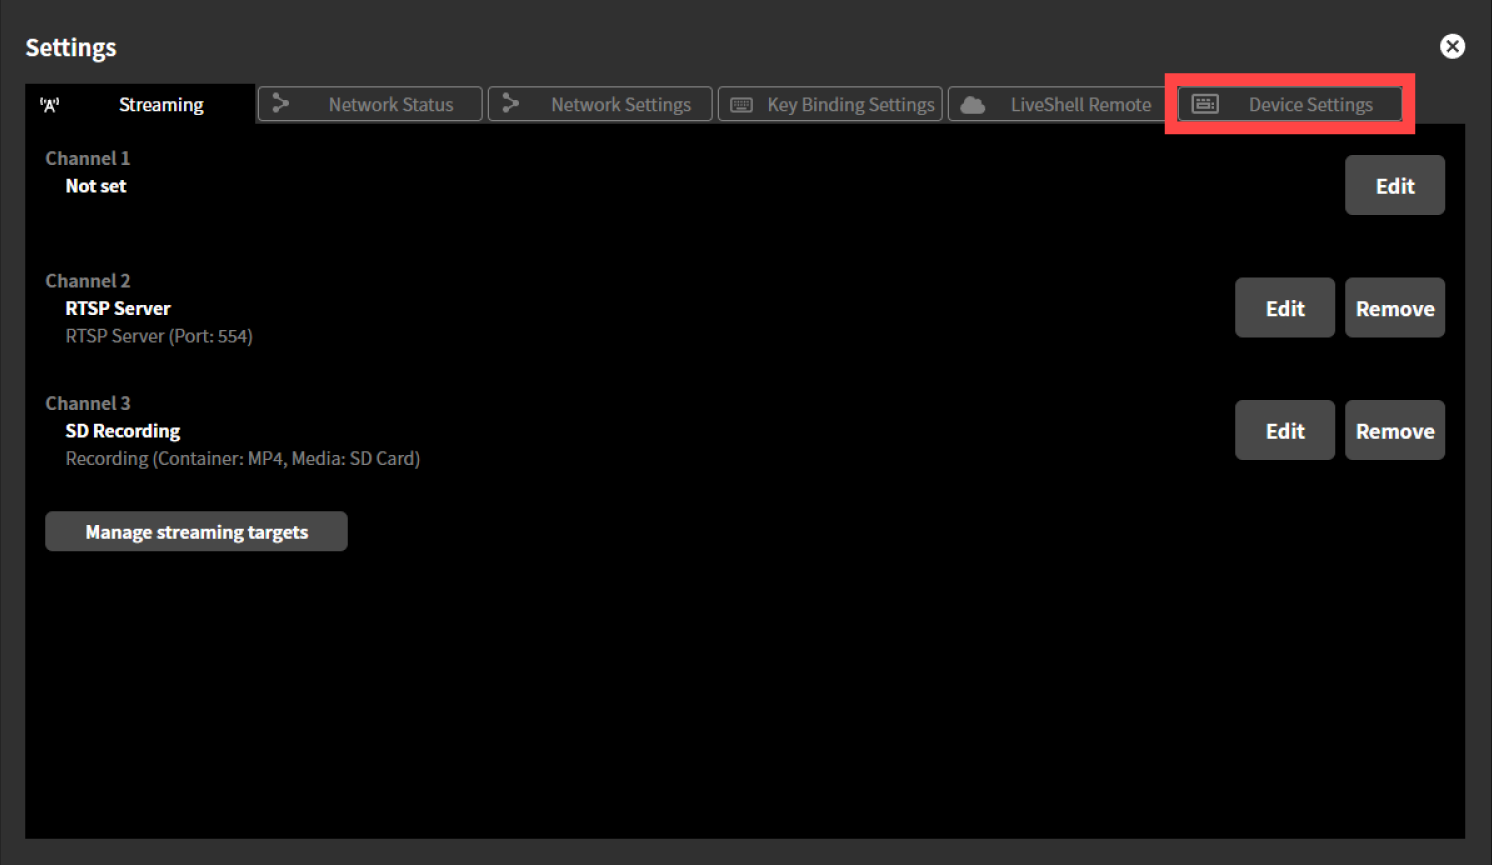
The current firmware version is slited in “Firmware Version”.
Using the unit buttons
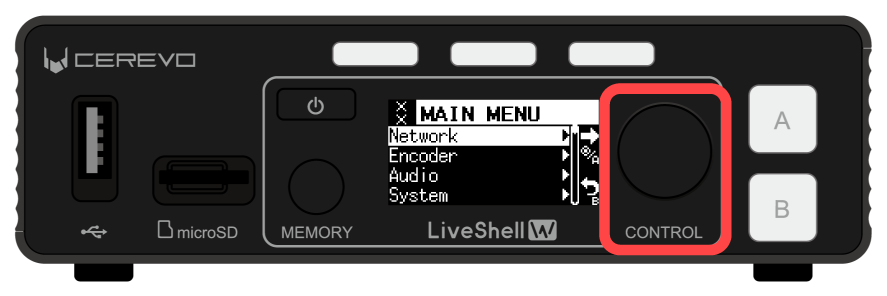
Push the control dial. When you push it, the “MAIN MENU” will be displayed.
Turn the control dial to select “System” and push the switch button A.
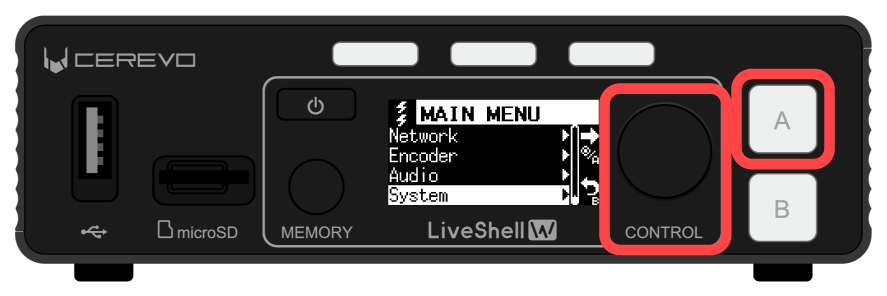
Turn the control dial to select “Firmware Version” and push the switch button A to check the current firmware version.
I want to assign different names to each device to distinguish them.
This product allows you to assign a unique name to each device.
To set up a name, follow the steps below.
This operation can be performed from LiveShell Studio. It cannot be set on the unit button operation.
Click “Settings” on the top screen.
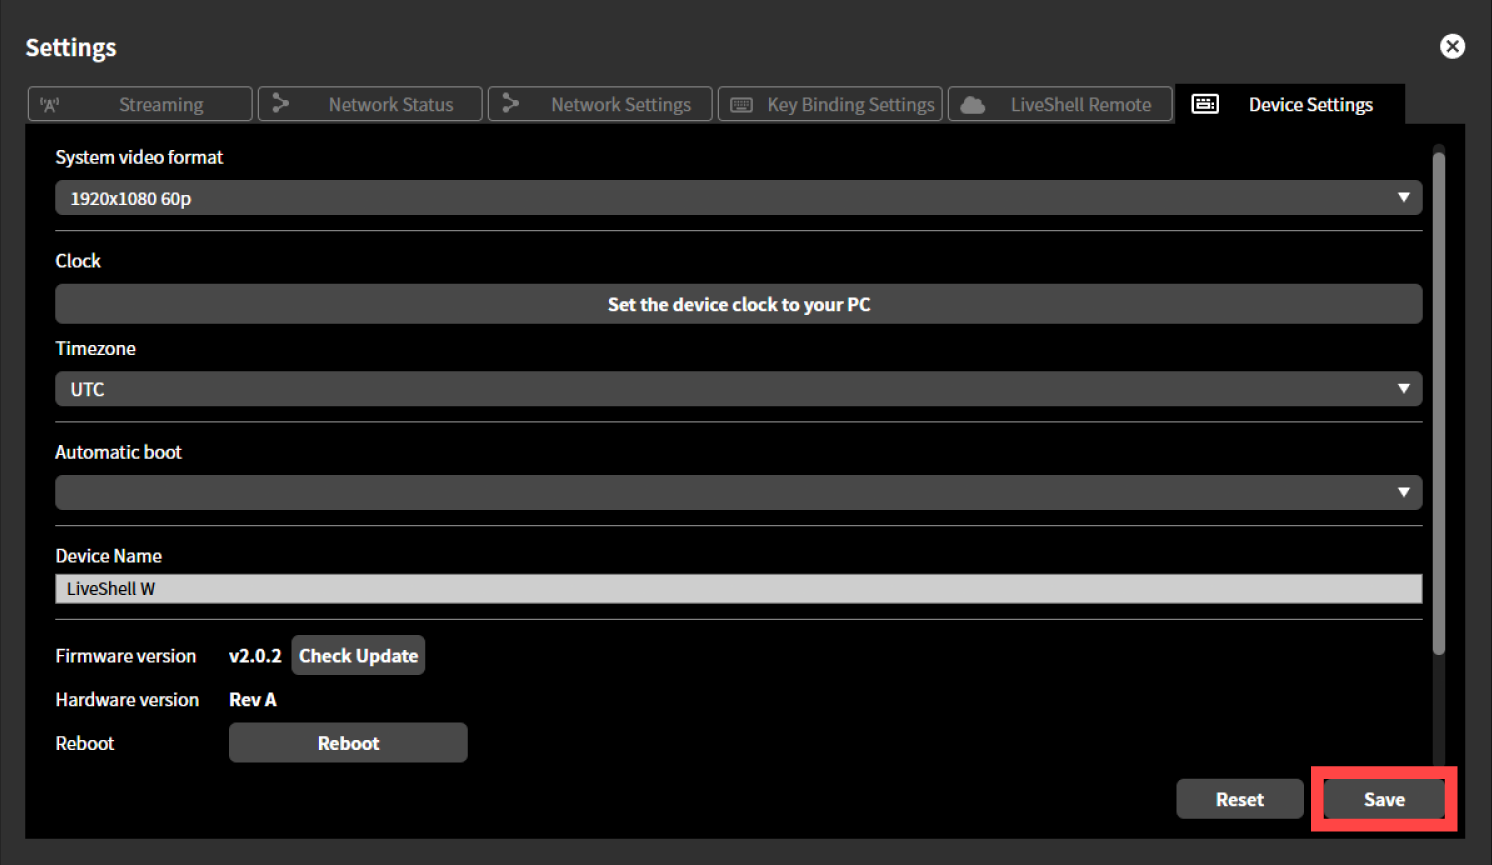
Click the “Device Settings” tab at the top of the “Settings” screen.
Enter a display name you wish in the “Device Name” text box.
Click the “Save” button to apply the settings.
How do I change the language?
This product unit displays English language only.
The display language for LiveShell Studio can be switched between Japanese and English from the “Language” drop-down menu in the upper right corner of the LiveShell Studio.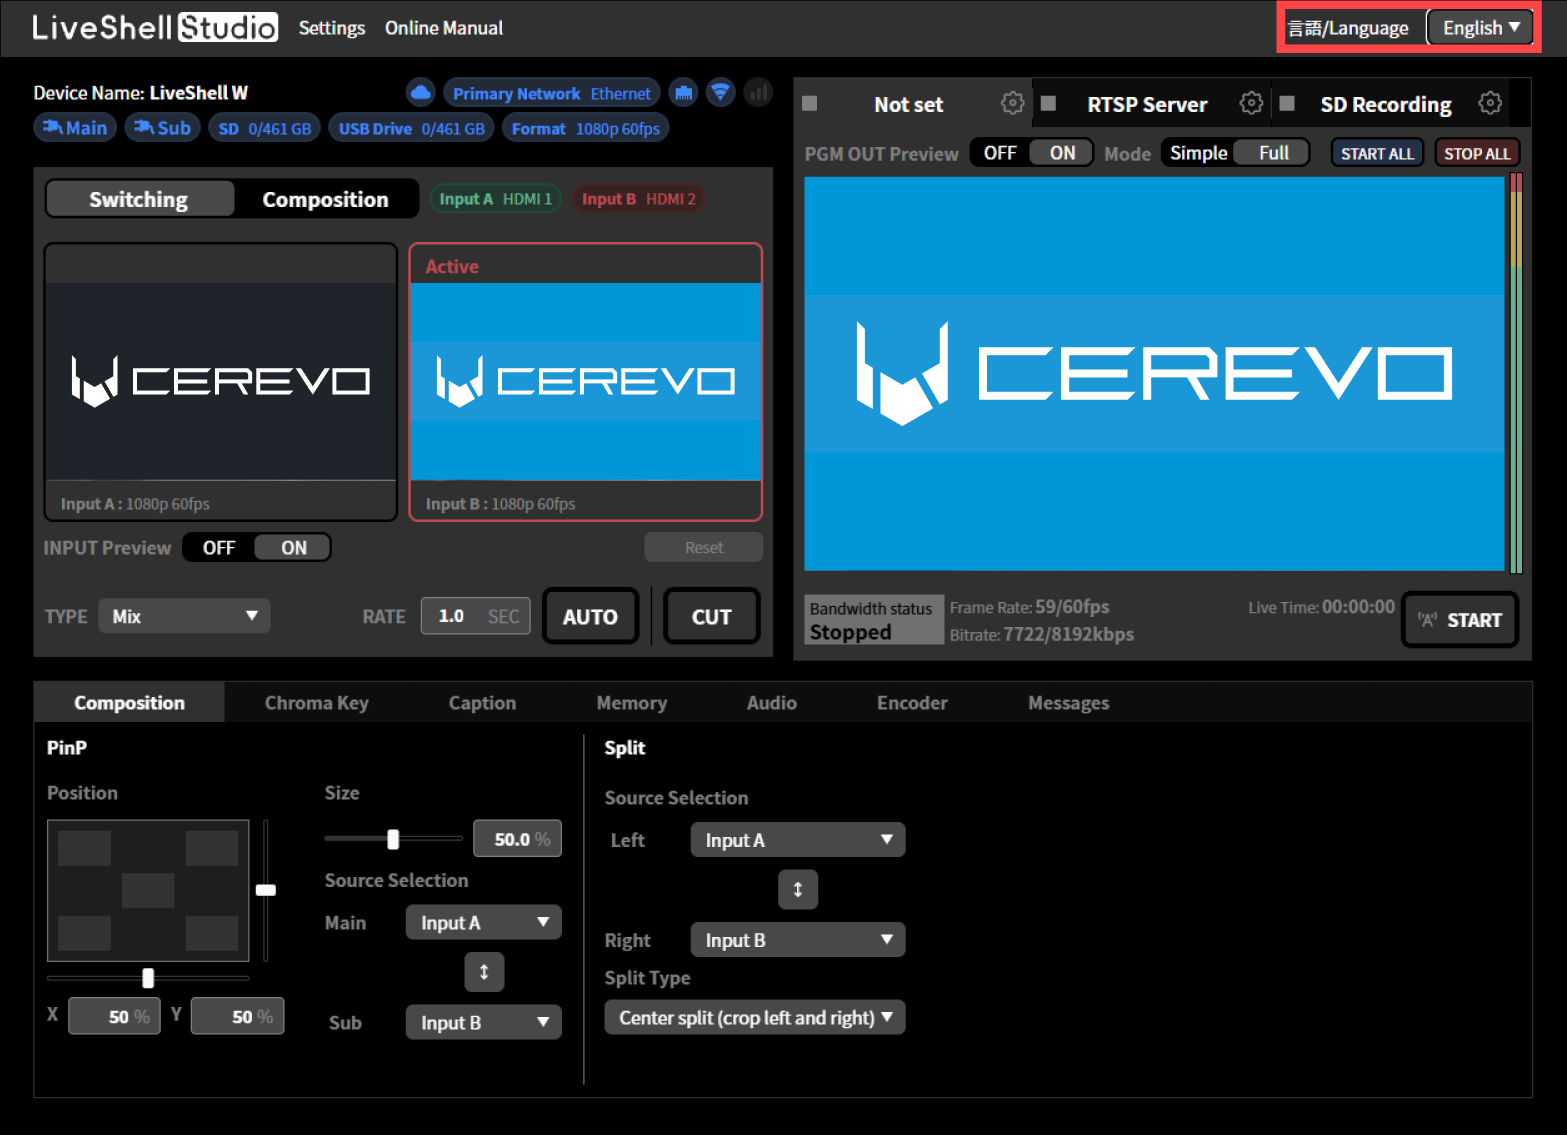
Is it possible to automatically start live streaming when an AC adapter or other power source is connected?
This can be done by turning on the auto-start setting and auto-start function.
See below for details on how to set this up.
→Automatic boot
→Auto live streaming start setting
I want to fix the unit’s IP address.
This product allows you to set a fixed IP address.
To set up a name, follow the steps below.
This operation can be performed from LiveShell Studio. It cannot be set on the unit button operation.
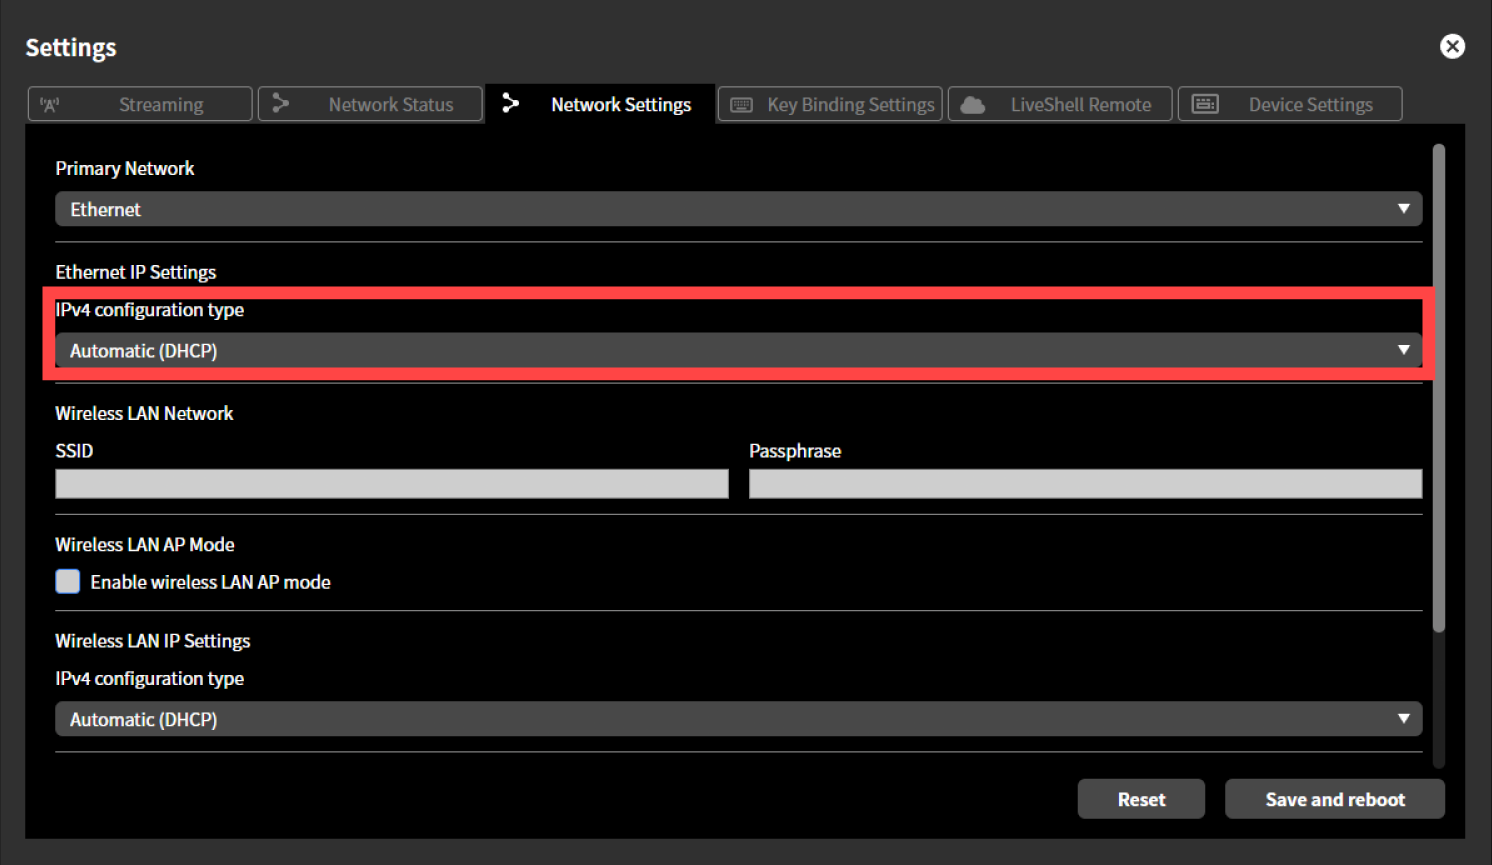
Click “Settings” on the top screen.
Click the “Network Settings” tab at the top of the “Settings” screen. The setup method is the same for both wired and wireless LAN. The following describes the setup method for wired LAN as an example. When setting up wireless LAN, perform the same steps in “Wireless LAN IP Settings”.
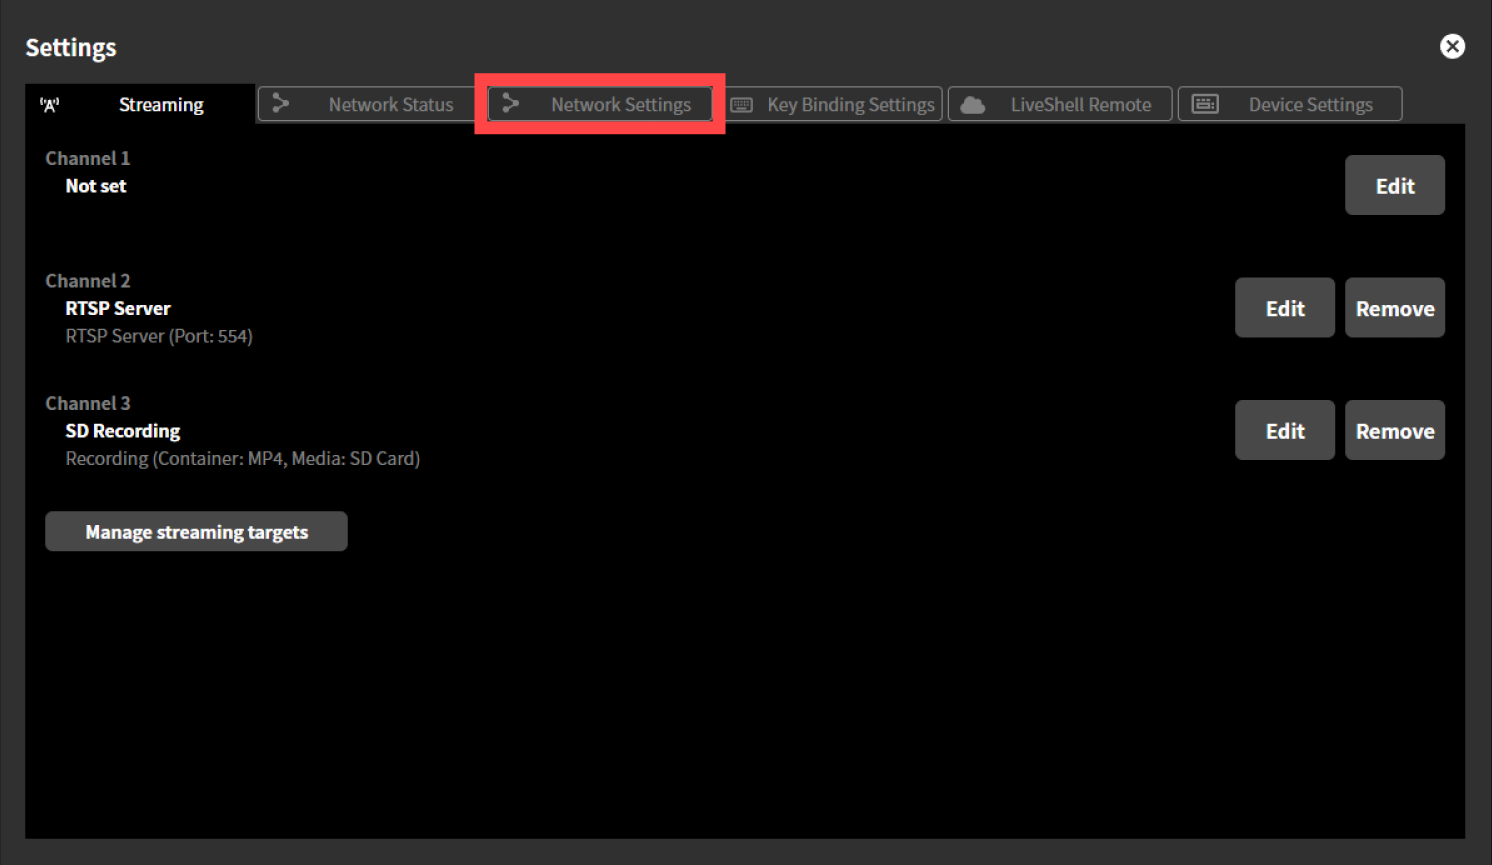
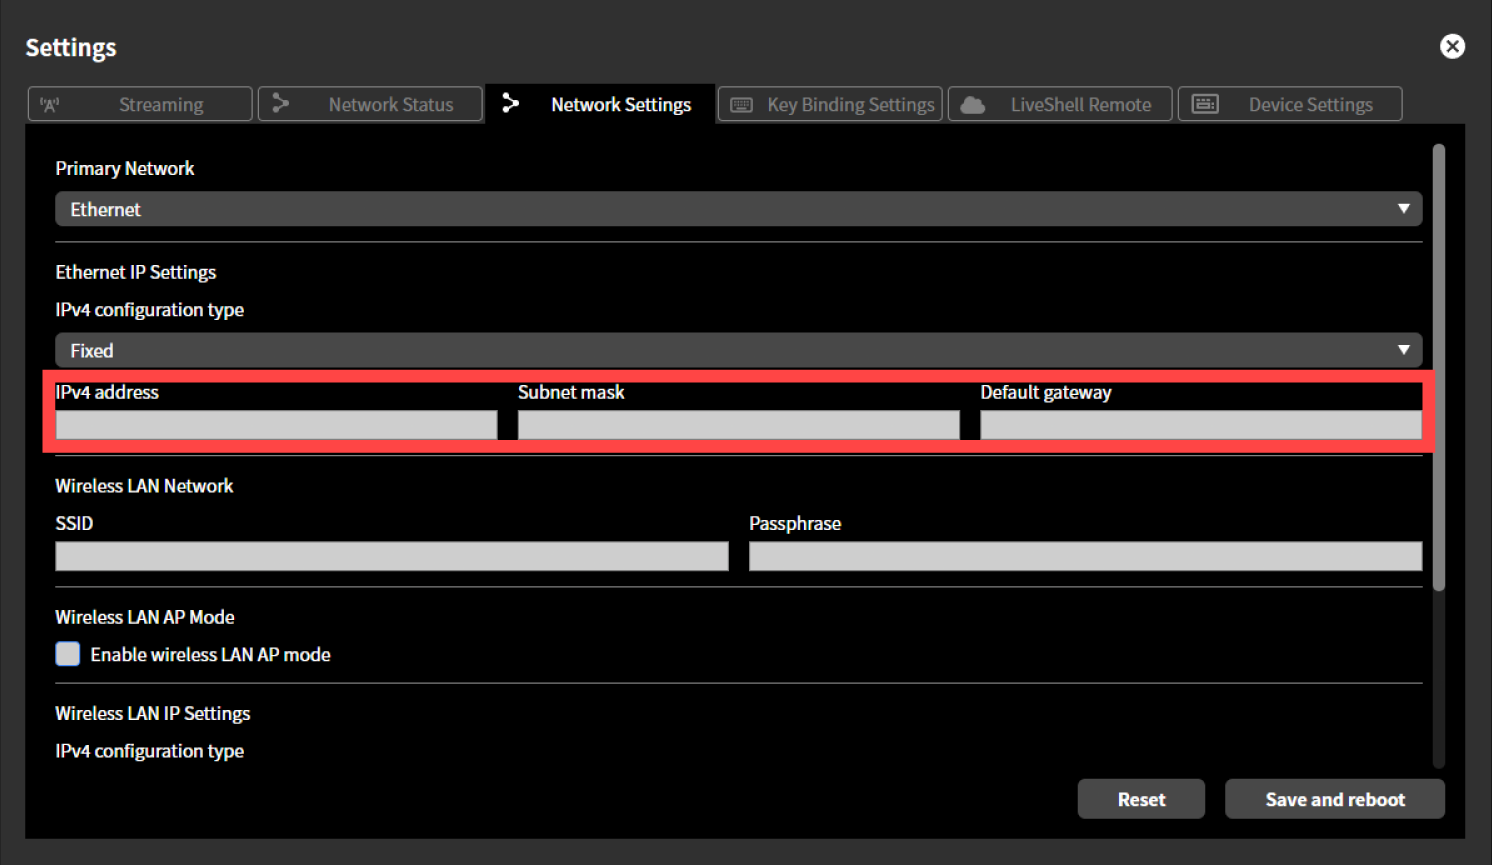
Select “Static” from the pull-down menu displayed in “IPv4 Setting Type”.
Enter the desired values for the displayed “IPv4 Address”, “Subnet Mask”, and “Default Gateway”.
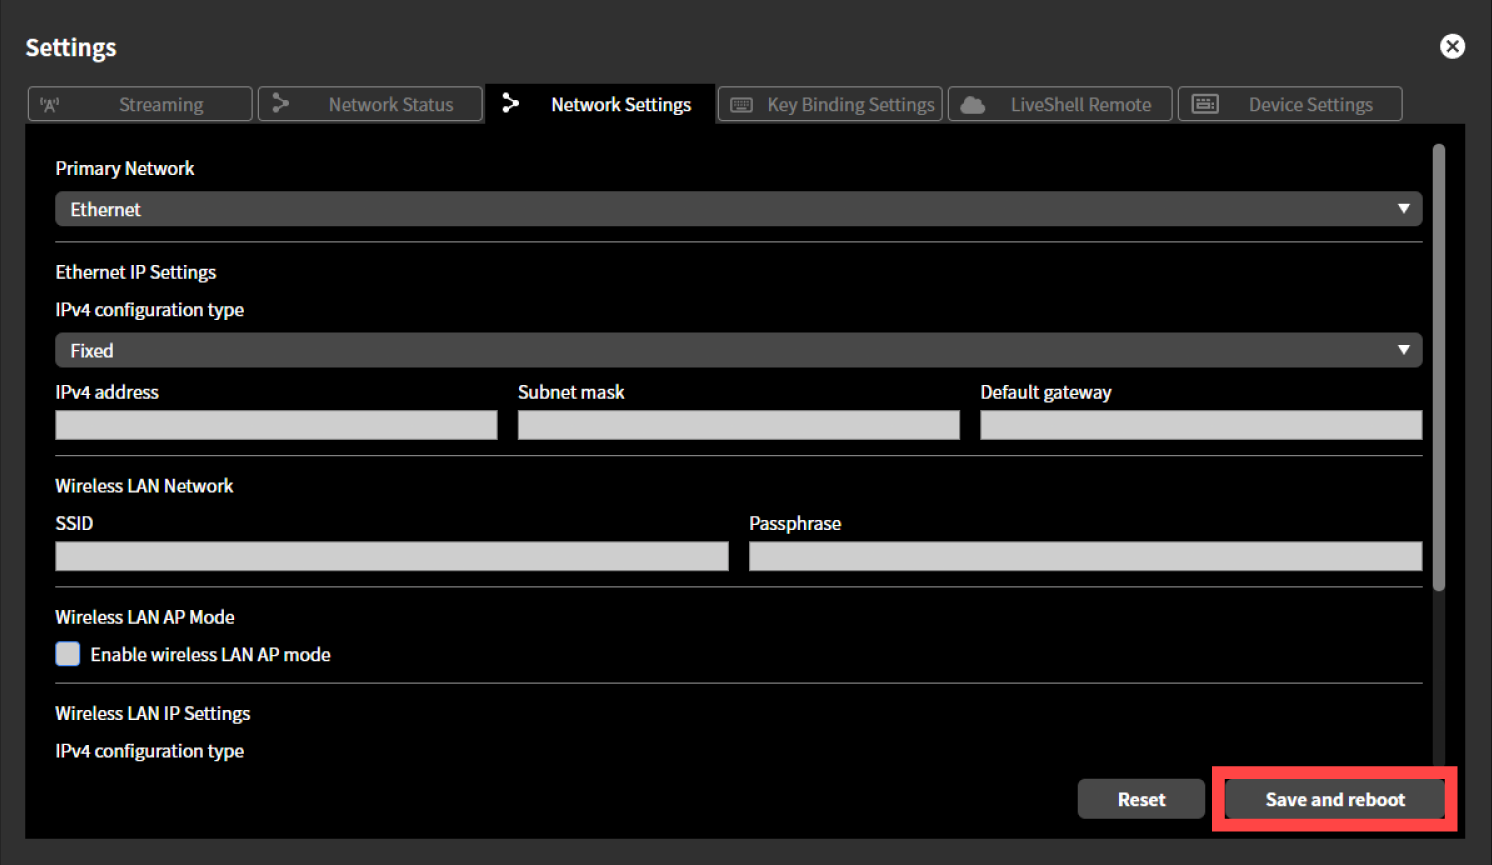
Click “Save and Restart”. The product will restart automatically.
About live streaming
Can I set different bitrates for each channel?
No, this product does not allow you to set different bitrates for each video or audio channel.
Can I add text or images to live streaming or recorded video?
Yes, this product has a caption function, so you can add custom text or images to streamed or recorded video.
For details on setup and operation, please see below.
→9 Caption setting and operation
How many simultaneous viewers are possible when live streaming using RTSP server mode?
This product’s RTSP server mode is available in Unicast mode and Multicast mode.
Unicast Mode
In unicast mode, the maximum number of simultaneous viewers is approximately 3-5 units. Connections with more than this number may result in audio and video distortion.
By configuring NAPT or similar settings, viewing from outside the network to which this product is connected is also possible.
Multicast Mode
When live streaming in multicast mode, viewing is possible on an unlimited number of devices within the multicast range.
However, the viewing range is limited to the multicast range, so viewing from outside the network is not possible.
Others
I want to initialize/factory reset the device.
For instructions on how to initialize/factory reset this product, please see below.
→12-1 Initialization
I lost the accessories and would like to purchase them.
The accessories items for this product are available for purchase at our official store, or contact our customer support team.
→Cerevo official store
13-2 Trouble shooting
Booting Problems
Won’t Power On/Won’t Start Up Properly
If this product won’t power on or doesn’t start up properly, please see below.
Check that the USB cable is connected properly.
Check that the USB cable is connected properly to this product or the AC adapter. Removing and reinserting the USB cable is also an effective solution.
Check that the AC adapter you are using meets the operating requirements
If you are using an AC adapter or mobile battery other than the one specified by our company, please make sure it meets all of the following requirements.
→ Power Supply Specification
If you are using a power bank, check that it is not in sleep mode.
Depending on the specifications of your power bank, the power bank’s output may be turned off if the connected device (in this case, this product) is not turned on for a certain period of time. Please refer to the power bank manual for instructions on how to exit sleep mode.
Force Shutdown and Restart
Force shut down the device and turn it back on.
→12-2 Forced shutdown
→Turning the power on
If the situation persist even after checking all of the above, please contact our support team with the information below.→Cerevo customer Support
The device won’t power on or boot properly.
The model and model number of the connected AC adapter or power bank (if it’s the accessory items enclosed with this product, please write it so).
You’ve checked the troubleshooting information but the problem persists.
The device starts automatically when plugged in.
The auto-start setting may be turned on.
See below for information on auto-start settings.
→Automatic boot
The device starts live streaming automatically when plugged in.
The auto-live-streaming-start setting may be turned on.”
See below for information on auto live streaming start settings.
→Auto live streaming start setting
LiveShell Studio Issues
The LiveShell Studio login URL has changed.
Network Connection Problems
Unable to Connect to LiveShell Studio via Wired LAN
If you are unable to connect to LiveShell Studio via wired LAN, please see below.
Check that the Connected Network Meets the Requirements
To use this product, the connected network must meet the following requirements.→Network Requirements
Check that the LAN Cable is Connected Properly
Check that the LAN cable is connected properly to this product and to network devices such as routers and switching hubs. Unplugging and plugging the LAN cable in again is also an effective method.
If the situation persist even after checking all of the above, please contact our support team with the information below.→Cerevo customer Support
Unable to Connect to LiveShell Studio via Wired LAN
The model and model number of the connected network device(s)
A simple connection diagram showing the connection status
You’ve checked the troubleshooting information but the problem persists.
Unable to connect to LiveShell Studio via wireless LAN
If you cannot connect to LiveShell Studio via wireless LAN, please see below.
Check that the SSID and passphrase (password) you entered are all correct.
Please double-check that the information you entered is correct. If you enter it using copy and paste, sometimes spaces or other characters may be included and entered incorrectly.
Wireless LAN access point mode is still enabled.
If wireless LAN access point mode is enabled, you will not be able to stream via wireless LAN.
→Connecting via Wireless LAN
Check that the Connected Network Meets the Requirements
To use this product, the connected network must meet the following requirements.→Network Requirements
If the situation persist even after checking all of the above, please contact our support team with the information below.→Cerevo customer Support
Unable to Connect to LiveShell Studio via Wireless LAN
The model and model number of the connected network device(s)
You’ve checked the troubleshooting information but the problem persists.
Problems with Streaming/Recording
Unable to Stream via Wired LAN
If you are unable to connect to LiveShell Studio via wired LAN, please see below.
Check that the Connected Network Meets the Requirements
To use this product, the connected network must meet the following requirements.→Network Requirements
Check that the LAN Cable is Connected Properly
Check that the LAN cable is connected properly to this product and to network devices such as routers and switching hubs. Unplugging and plugging the LAN cable in again is also an effective method.
If the situation persist even after checking all of the above, please contact our support team with the information below.→Cerevo customer Support
Unable to live streaming via Wired LAN
The model and model number of the connected network device(s)
A simple connection diagram showing the connection status
You’ve checked the troubleshooting information but the problem persists.
Unable to live stream via wireless LAN
If you cannot connect to LiveShell Studio via wireless LAN, please see below.
Wireless LAN access point mode is still enabled.
If wireless LAN access point mode is enabled, you will not be able to stream via wireless LAN.
→Connecting via Wireless LAN
Check that the Connected Network Meets the Requirements
To use this product, the connected network must meet the following requirements.→Network Requirements
If the situation persist even after checking all of the above, please contact our support team with the information below.→Cerevo customer Support
Unable to live streaming via Wireless LAN
The model and model number of the connected network device(s)
You’ve checked the troubleshooting information but the problem persists.
Video is not recognized correctly/Errors occur
If the video is not recognized correctly or an error occurs, please see below.
Check that the HDMI cable is connected correctly.
Check that the HDMI cable is connected correctly to this product and to video devices such as cameras and computers. Another effective method is to unplug and plug in the HDMI cable.If you unplug and plug in the HDMI cable, please restart this product.
→Restarting
Check the system video format.
The video format of the video device (camera, computer, etc.) using HDMI input must be the same as the system video format of this product. If the settings are different, the video may not be recognized correctly by this product. For information on the system video format, see below.
→6-1 System video format setting
Restarting the Product
If you change the system video format or video device output settings while the product power is on, the product may not recognize the video correctly. If this happens, restart the product.
→Restarting
Check if there is any other equipment such as an HDMI splitter or converter that is not connected.
If an HDMI splitter or video converter is connected between this product and a video device such as a camera or computer, the product may not recognize the video or audio properly. Connect this product directly to the video device such as a camera or computer and check if the issue persists.
→Can I use an HDMI splitter or video converter?
If the situation persist even after checking all of the above, please contact our support team with the information below.→Cerevo customer Support
The model and model number of the connected video device(s).
A simple connection diagram showing the connection status
A screenshot of the LiveShell Studio homepage.
If the video is not being recognized correctly, please provide specific details about the video problem (e.g., the video is green, there is noise, etc).
If an error has occurred, please provide a screenshot of the error message(s).
You’ve checked the troubleshooting information but the problem persists.
Unable to live stream due to the error “A streaming setting error has occurred on channel #1/2/3. Please review your streaming destination settings”.
Unable to live stream due to the error “An RTMP authentication error has occurred on channel #1/2/3. Please set up an RTMP server account”.
There is a delay in the live streamed video.
Depending on the actual streaming environment, there may be a delay of several seconds to several tens of seconds the video input to this product or operations performed in LiveShell Studio are reflected in the streamed video.
This delay is caused by the network path from this product to the streaming service server to which the data is sent, as well as processing on the server side.Depending on the streaming service, streaming with low latency may be possible. Please refer to the manual for each live streaming platform service for details.
Video and audio are out of sync (audio delay occurs)
Video and audio may be out of sync due to incompatibility or settings on each device connected to this product.
If this occurs, change the settings on each device or adjust the audio delay compensation settings on this product.→Setting delay compensation for each source
Unable to record the live streaming with an error message “An SD card/USB drive write error occurred on channel #1/2/3. Please insert a writable SD card/USB drive”.
See 14-1 Error messages on LiveShell Studio
If the situation persist even after checking all of the above, please contact our support team with the information below.→Cerevo customer Support
An SD card/USB flash write error has occurred.
The model and model number of the connected SD card/USB flash.
You’ve checked the troubleshooting information but the problem persists.
Unable to recording due to the error “SD card/USB drive insufficient capacity error on channel #1/2/3. Please insert an SD card/USB drive with available space”.
Unable to recording due to the error “SD card/USB drive not inserted on channel #1/2/3. Please insert an SD card/USB drive for recording”.
See 14-1 Error messages on LiveShell Studio
If the situation persist even after checking all of the above, please contact our support team with the information below.→Cerevo customer Support
An SD card/USB flash error has occurred.
The model and model number of the connected SD card/USB flash.
You’ve checked the troubleshooting information but the problem persists.
Other issues
The unit heats up during operation.
This product may heat up during operation, but this is not a malfunction.
Image retention/double vision on the main display
This product is equipped with an OLED display.
Due to the characteristics of OLED, image burn-in may occur if the same image is displayed for an extended period of time.To prevent image burn-in, use the screen saver function. For details on the screen saver function, see below.→Screen saver setting
The buttons or control dial on the unit are unresponsive.
The unit may have frozen.
Force shut down the device and turn it back on.
→12-2 Forced shutdown
→Turning the power on
If the situation persist even after checking all of the above, please contact our support team with the information below.→Cerevo customer Support
The buttons and control dial on the unit are unresponsive.
You’ve checked the troubleshooting information but the problem persists.