2 Names and functions of each part
The names and functions of the part of this product are shown in the figure below.
2-1 LiveShell W unit
Front
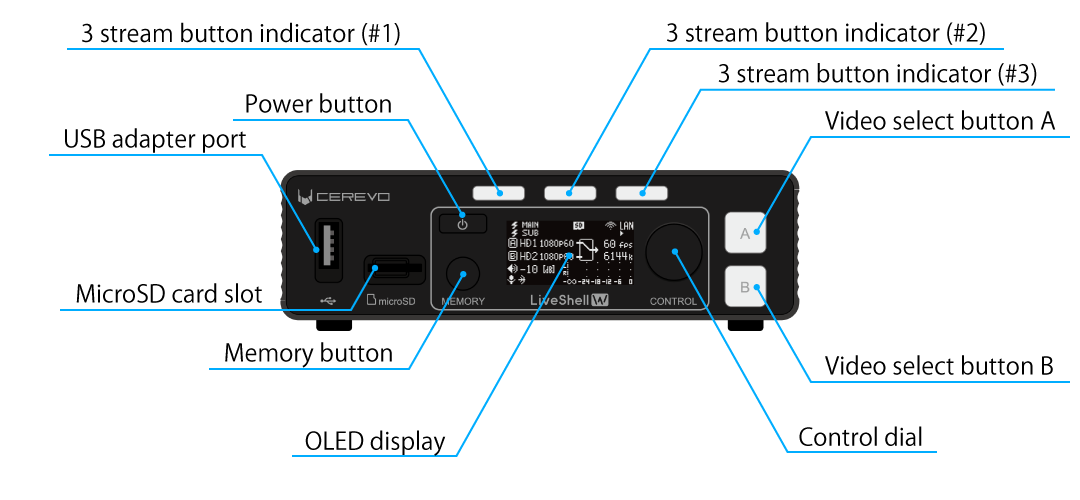
USB adapter port
USB A port for connecting accessories for this product.
MicroSD card slot
This is used to insert a microSD card for video recording.
Power button
This button is used to turn on or off this product.
Memory button
This button switches display to memory mode if you use the memory function.
3 stream button indicator
These buttons are used to start and stop live streaming. The button is internally illuminated and indicates the live streaming status by light.
OLED display
The OLED display is used to show the operating status of this product. The menu is displayed during the settings using the buttons on the main unit.
Control dial
This dial is used during the settings and perform other operations on this product.
Video select button A
This is one of two buttons used to select the video received from the two HDMI inputs. The button is internally illuminated and indicates the selection status by light.
Video select button B
This is one of two buttons used to select the video received from the two HDMI inputs. The button is internally illuminated and indicates the selection status by light.
Rear
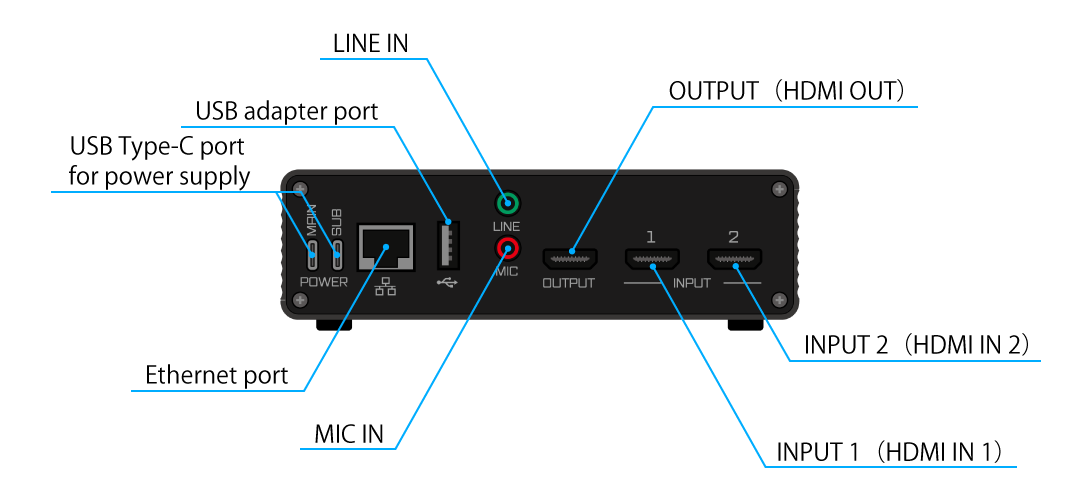
USB Type-C port for power supply
These are for the power supplies for this product; two inputs, MAIN and SUB.
Ethernet port
This is the LAN terminal for connecting this product to a network.
USB adapter port
USB A port for connecting a wireless LAN adapter or USB communication adapter to this product.
LINE IN
3.5mm stereo jack for line-level analog audio signal input to this product.
MIC IN
3.5 mm monaural jack for inputting a microphone-level analog audio signal to this product.
INPUT 1(HDMI IN 1)
This is one of the HDMI inputs for inputting video and audio signals to this product.
INPUT 2(HDMI IN 2)
This is one of the HDMI inputs for inputting video and audio signals to this product.
OUTPUT(HDMI OUT)
HDMI OUT is for a HDMI output port to monitor the video and audio signals being streamed by this product.
Side Left
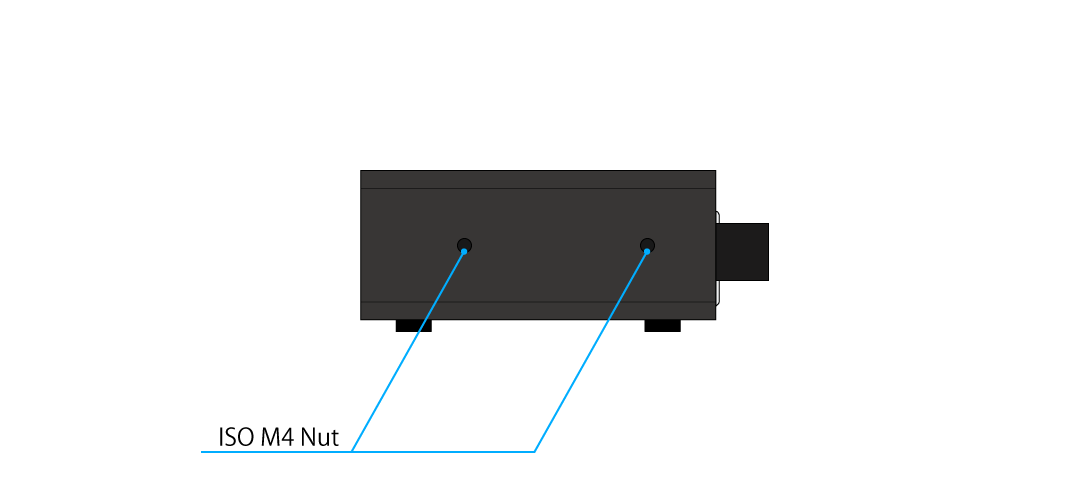
ISO M4 Nut
These nuts are used to secure this product.
Side Right
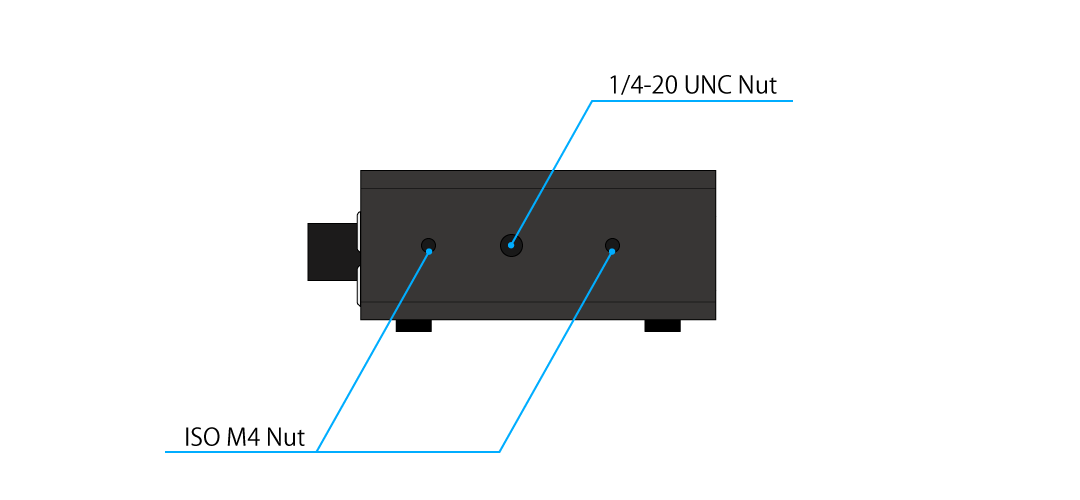
1/4-20 UNC Nut
These nuts are to mount this product on a tripod, etc.
ISO M4 Nut
These nuts are used to secure this product.
Bottom
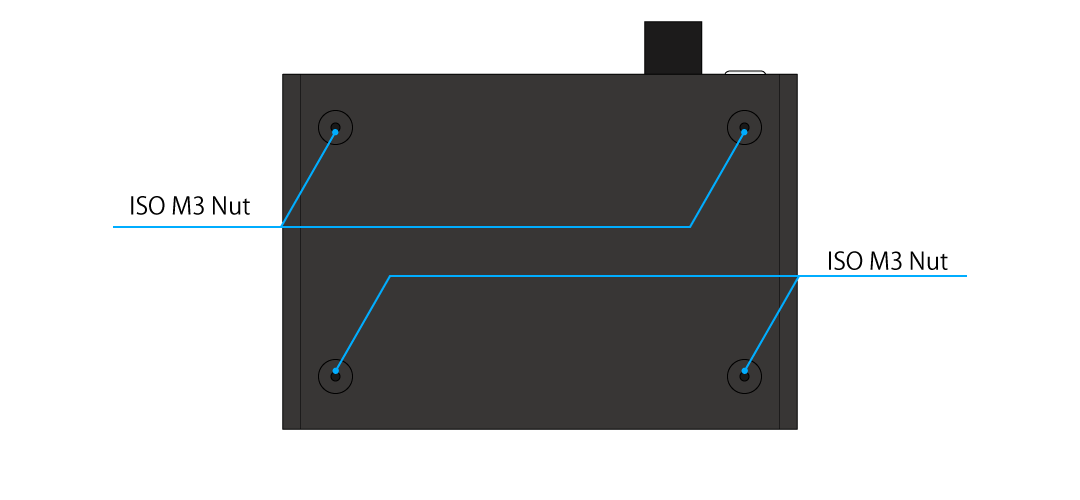
ISO M3 Nut
These nuts are used to secure this product to shelves, etc.
2-2 LiveShell Studio
About LiveShell Studio
LiveShell Studio is a web application built into this product.This product is designed to be operated mainly by using LiveShell Studio and it can be accessed via a PC/tablet/Smartphone (hereinafter referred to as “operating device”). Many of the LiveShell W functions are controlled or changed by using LiveShell Studio.
How to view the LiveShell Studio screen
The LiveShell Studio application screen is displayed in a web browser. Here’s how to view this screen.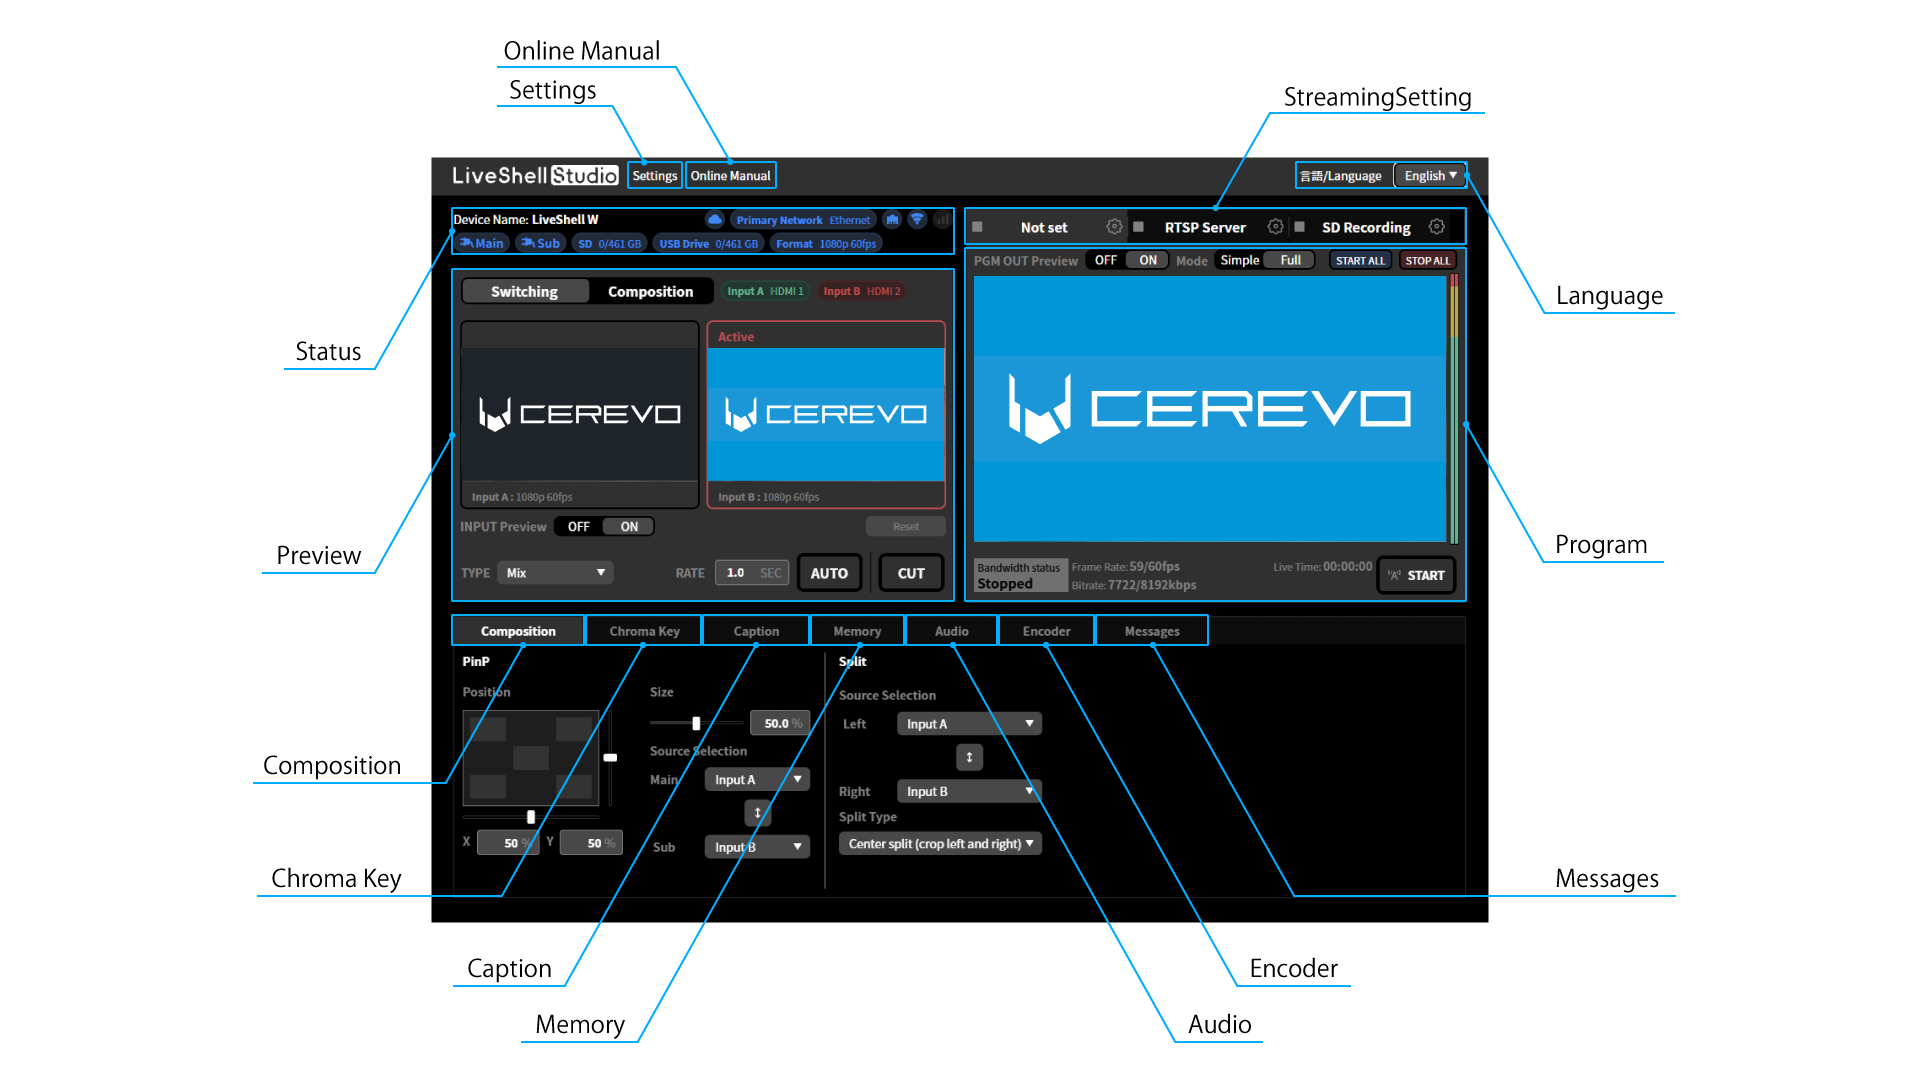
Settings
You can view and modify various settings.
Online Manual
Open the online manual.
Language
You can change LiveShell Studio display language. The available languages are as follows:
Japanese
English
Status
Displays the current status of each channel. The displayed content is as follows:
Connection Status to LiveShell Remote
Displays the connection status to LiveShell Remote. If the connection cannot be detected, it will be grayed out.
→8 Remote control setting with LiveShell Remote
Priority network
Displays the type of connection interface currently prioritized for use with the network.
Network type
Displays the type of connection interface currently connected to the network. If a connection cannot be detected, this will be grayed out.
Power status
Displays whether the power source, such as an AC adapter or power bank, is connected to the MAIN or SUB port. This will be grayed out if a connection cannot be detected.
Media connection status
Displays the mount status and remaining capacity of the SD card/USB drive. This will be grayed out if a connection cannot be detected.
System video format
Displays the system video format currently set on the unit.
→6-1 System video format setting
Preview display area
Displays thumbnails of the video input to the unit. You can also switch video sources using “Switching” and composite video sources using “Compositing”.
→Video switching
→Video manipulation
Program display area
Displays the composited program output video.
→Real time live viewing from the program output
→Real time live viewing restrictions
Streaming destination settings
You can configure streaming settings for each channel.
→7 Live streaming destination settings/recording settings
Composition tab
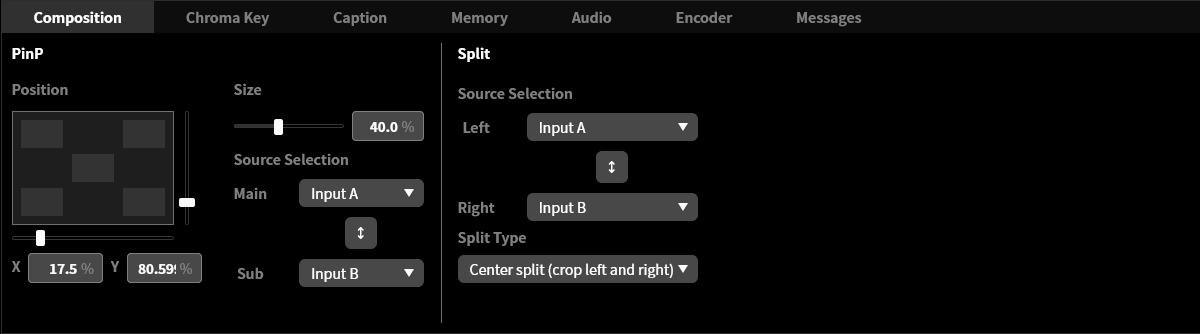
You can configure settings related to video composition.
→Video manipulation
Chroma Key tab
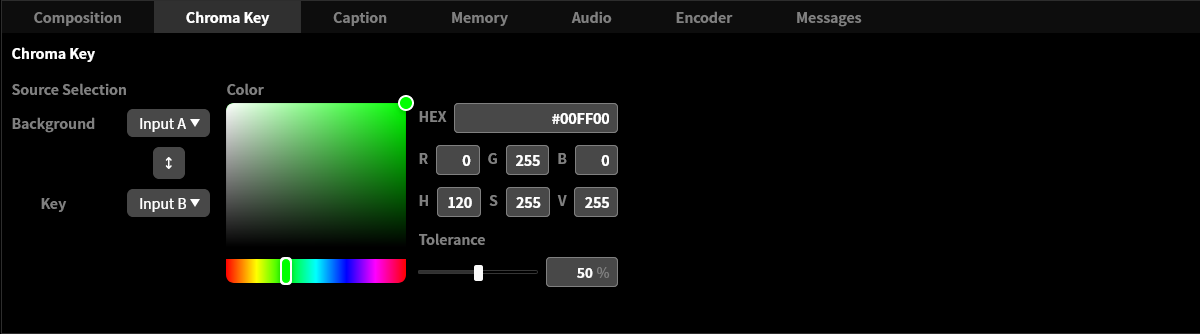
You can configure settings related to the chroma key.
→Chroma key
Caption tab
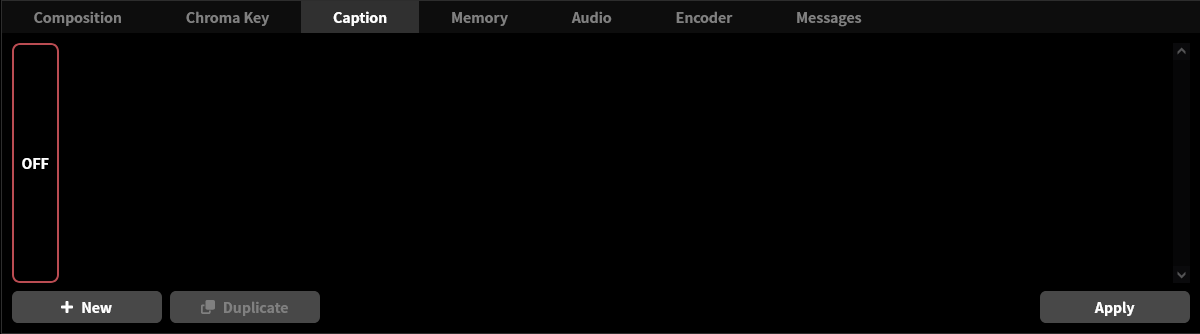
You can configure settings related to the caption.
→Caption/Overlay image
Memory tab
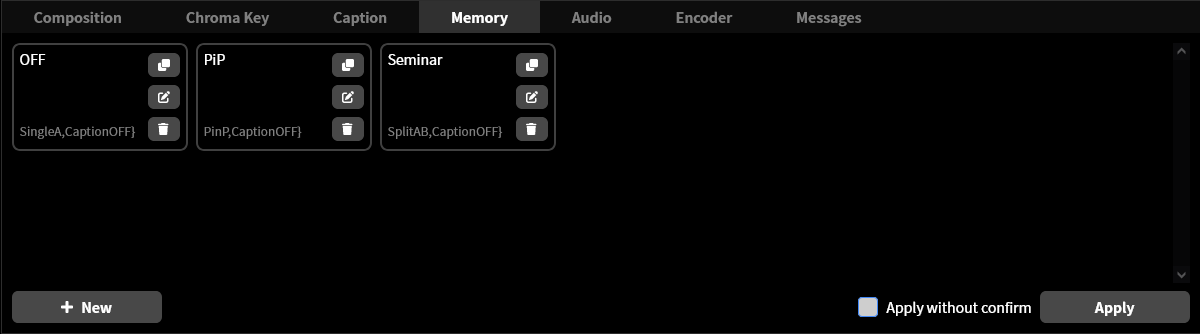
You can configure settings related to the memory function.
→Memory function
Audio tab
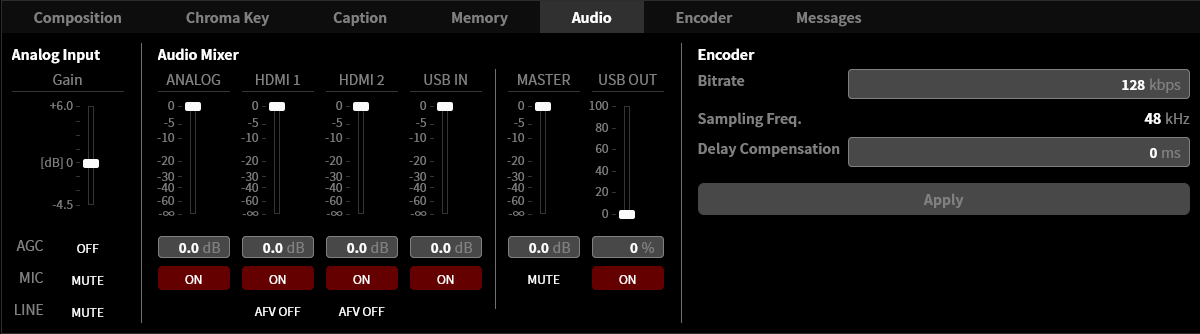
You can configure settings related to the audio.
→6-3 Setting the audio
Encoder tab
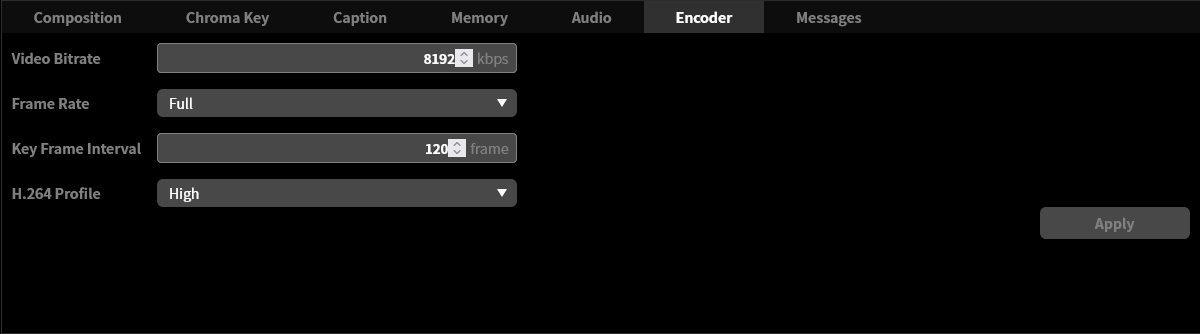
You can configure settings related to the encoder.
→Video encoder settings
Message tab
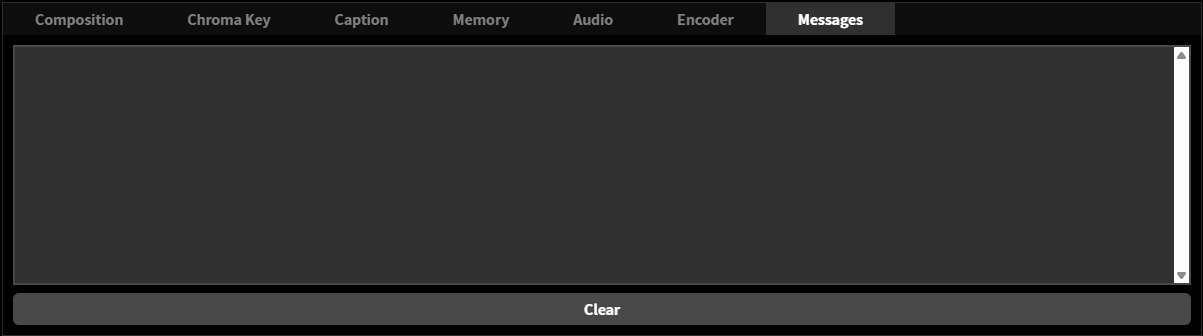
Displays messages about the current operation and any error messages.
→14 Error message